
The University of
Pennsylvania Libraries
needed some printing presses. They needed a flatbed -
galley style - proof or sign press and a mobile platen
press, so they came to us. They
took a nice Morgan Line-o-Scribe we had here and asked
me to restore a 5x8 Kelsey for them as well. They have organized A Year of Whitman, to celebrate the bicentennial of the birth of Walt Whitman, America's "poet of democracy," on May 31, 2019.
The press has been fully disassembled, with all cast
iron parts sandblasted and immediately primed. It is
getting new stainless steel shafts which will be held in
place using spring steel E-clips, a new set of
freshly-cast 20-durometer urethane rubber ink rollers -
soft but hardy and good for at least ten years' service,
a new gripper spring and new grippers and new - or
perfectly restored - roller hooks and springs. A little interesting history about this press: It began printing in Philadelphia many years ago, but then was taken to Michigan by its owner, who then decided that he no longer needed it, so he contacted me and brought it back to PA with him on a family visit. So now, the press is going "back home" to Philadephia, where it first began printing so many years ago... And more... A few years after this press was built, Kelsey Company and/or Pfeiffer Company of Newark, NJ built an identical press - but cast in aluminum to save weight and designed for quick assembly and disassembly so that it would fit into a suitcase and be air-dropped behind the lines in Europe for use by the Dutch Resistance in their struggle against Nazi Germany during WWII. Such a press was found recently in Holland, but since the story is that it had been airdropped by the British, their press was initially assumed to be an English-made Adana press. The museum in Holland contacted us to confirm its identification, but we told them that it was not the Adana they had assumed it must be, but was a 5x8 Kelsey press just like the one we are restoring for UPenn. And, it was made in the U.S. This press, however, was special. It was cast of aluminum and was also modified for easy assembly and disassembly and was carried in a normal-sized suit case. The cast-iron press weighs 65 pounds, whereas one cast of aluminum would only weigh about 25 pounds, so a these presses were supplied to the British who arranged for them to be air dropped to the Dutch Resistance who used them to forge official documents and anything else needed to support the resistance. 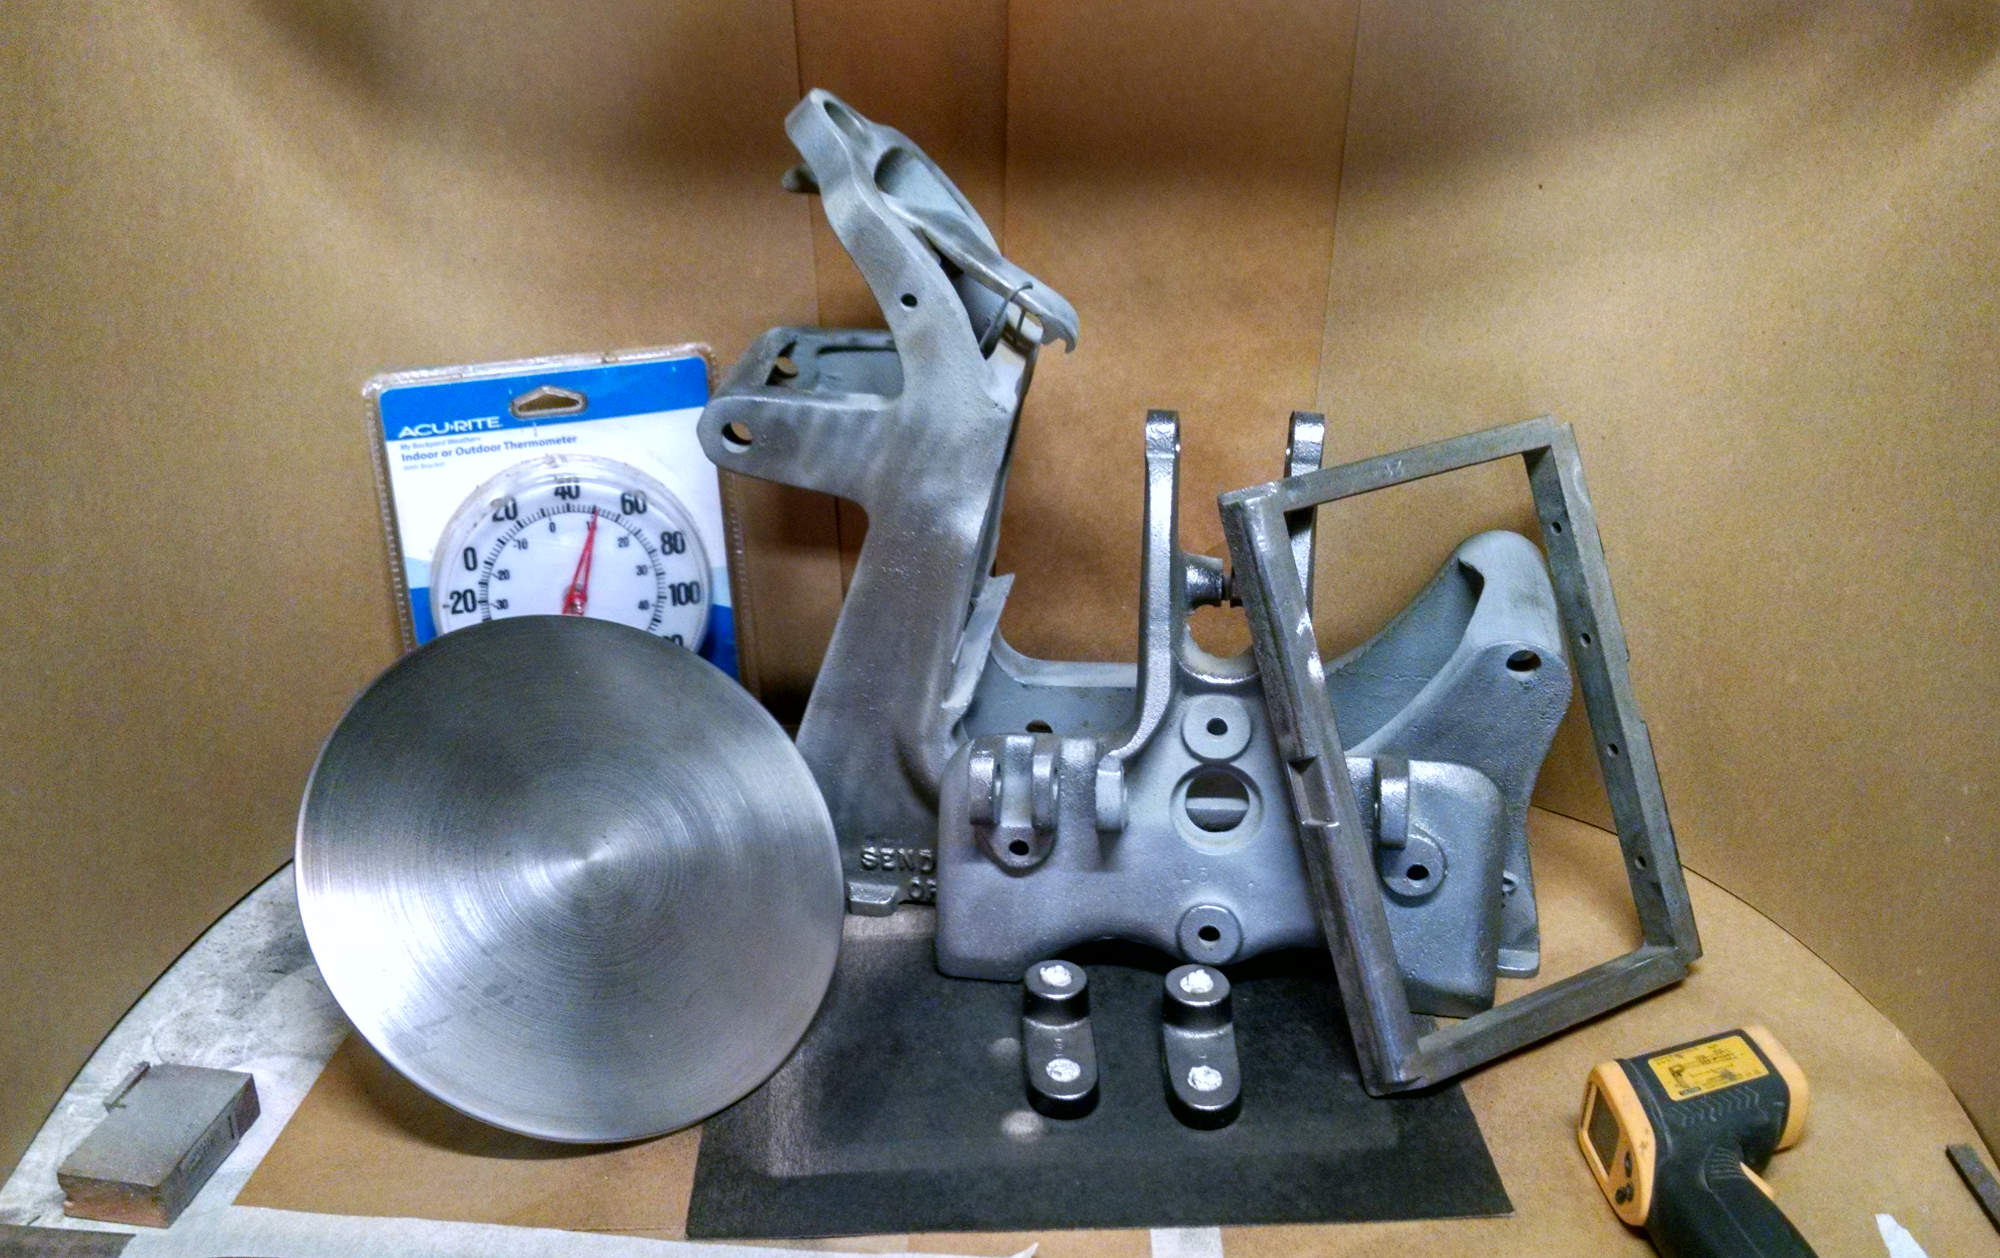 Jan 30, 2019 Jan 30, 2019Progress so far: Well, the press was sandblasted and primed quite a while ago, so the first step was to remove the old primer and prepare the press and parts for repainting. This time, it will be black. The ink disk has been refinished on the lathe, using the sanding sponge shown to the bottom left corner of this photo. We made a special adapter that allows us to mount the ink disk on our big Shop Smith lathe and we can hand-sand the surface to make it shine like new - better than new, in fact! 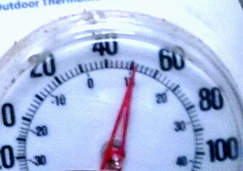 So
most of the parts have had the primer and any surface rust
or imperfection removed, and are about ready to paint. So
most of the parts have had the primer and any surface rust
or imperfection removed, and are about ready to paint. But today, it is too cold in the shop. 5 degrees outside, barely 50 in the shop. Too cold to paint. Temps should rise in a few days and then we can get the paint cabinet up to a more appropriate 70 degrees. The device shown in the lower right of the photo above is our laser temperature sensor, which can tell us - within a few degrees - when the cast iron parts are warm enough to accept paint for a perfect wearever bond. Right now, it's just too cold...  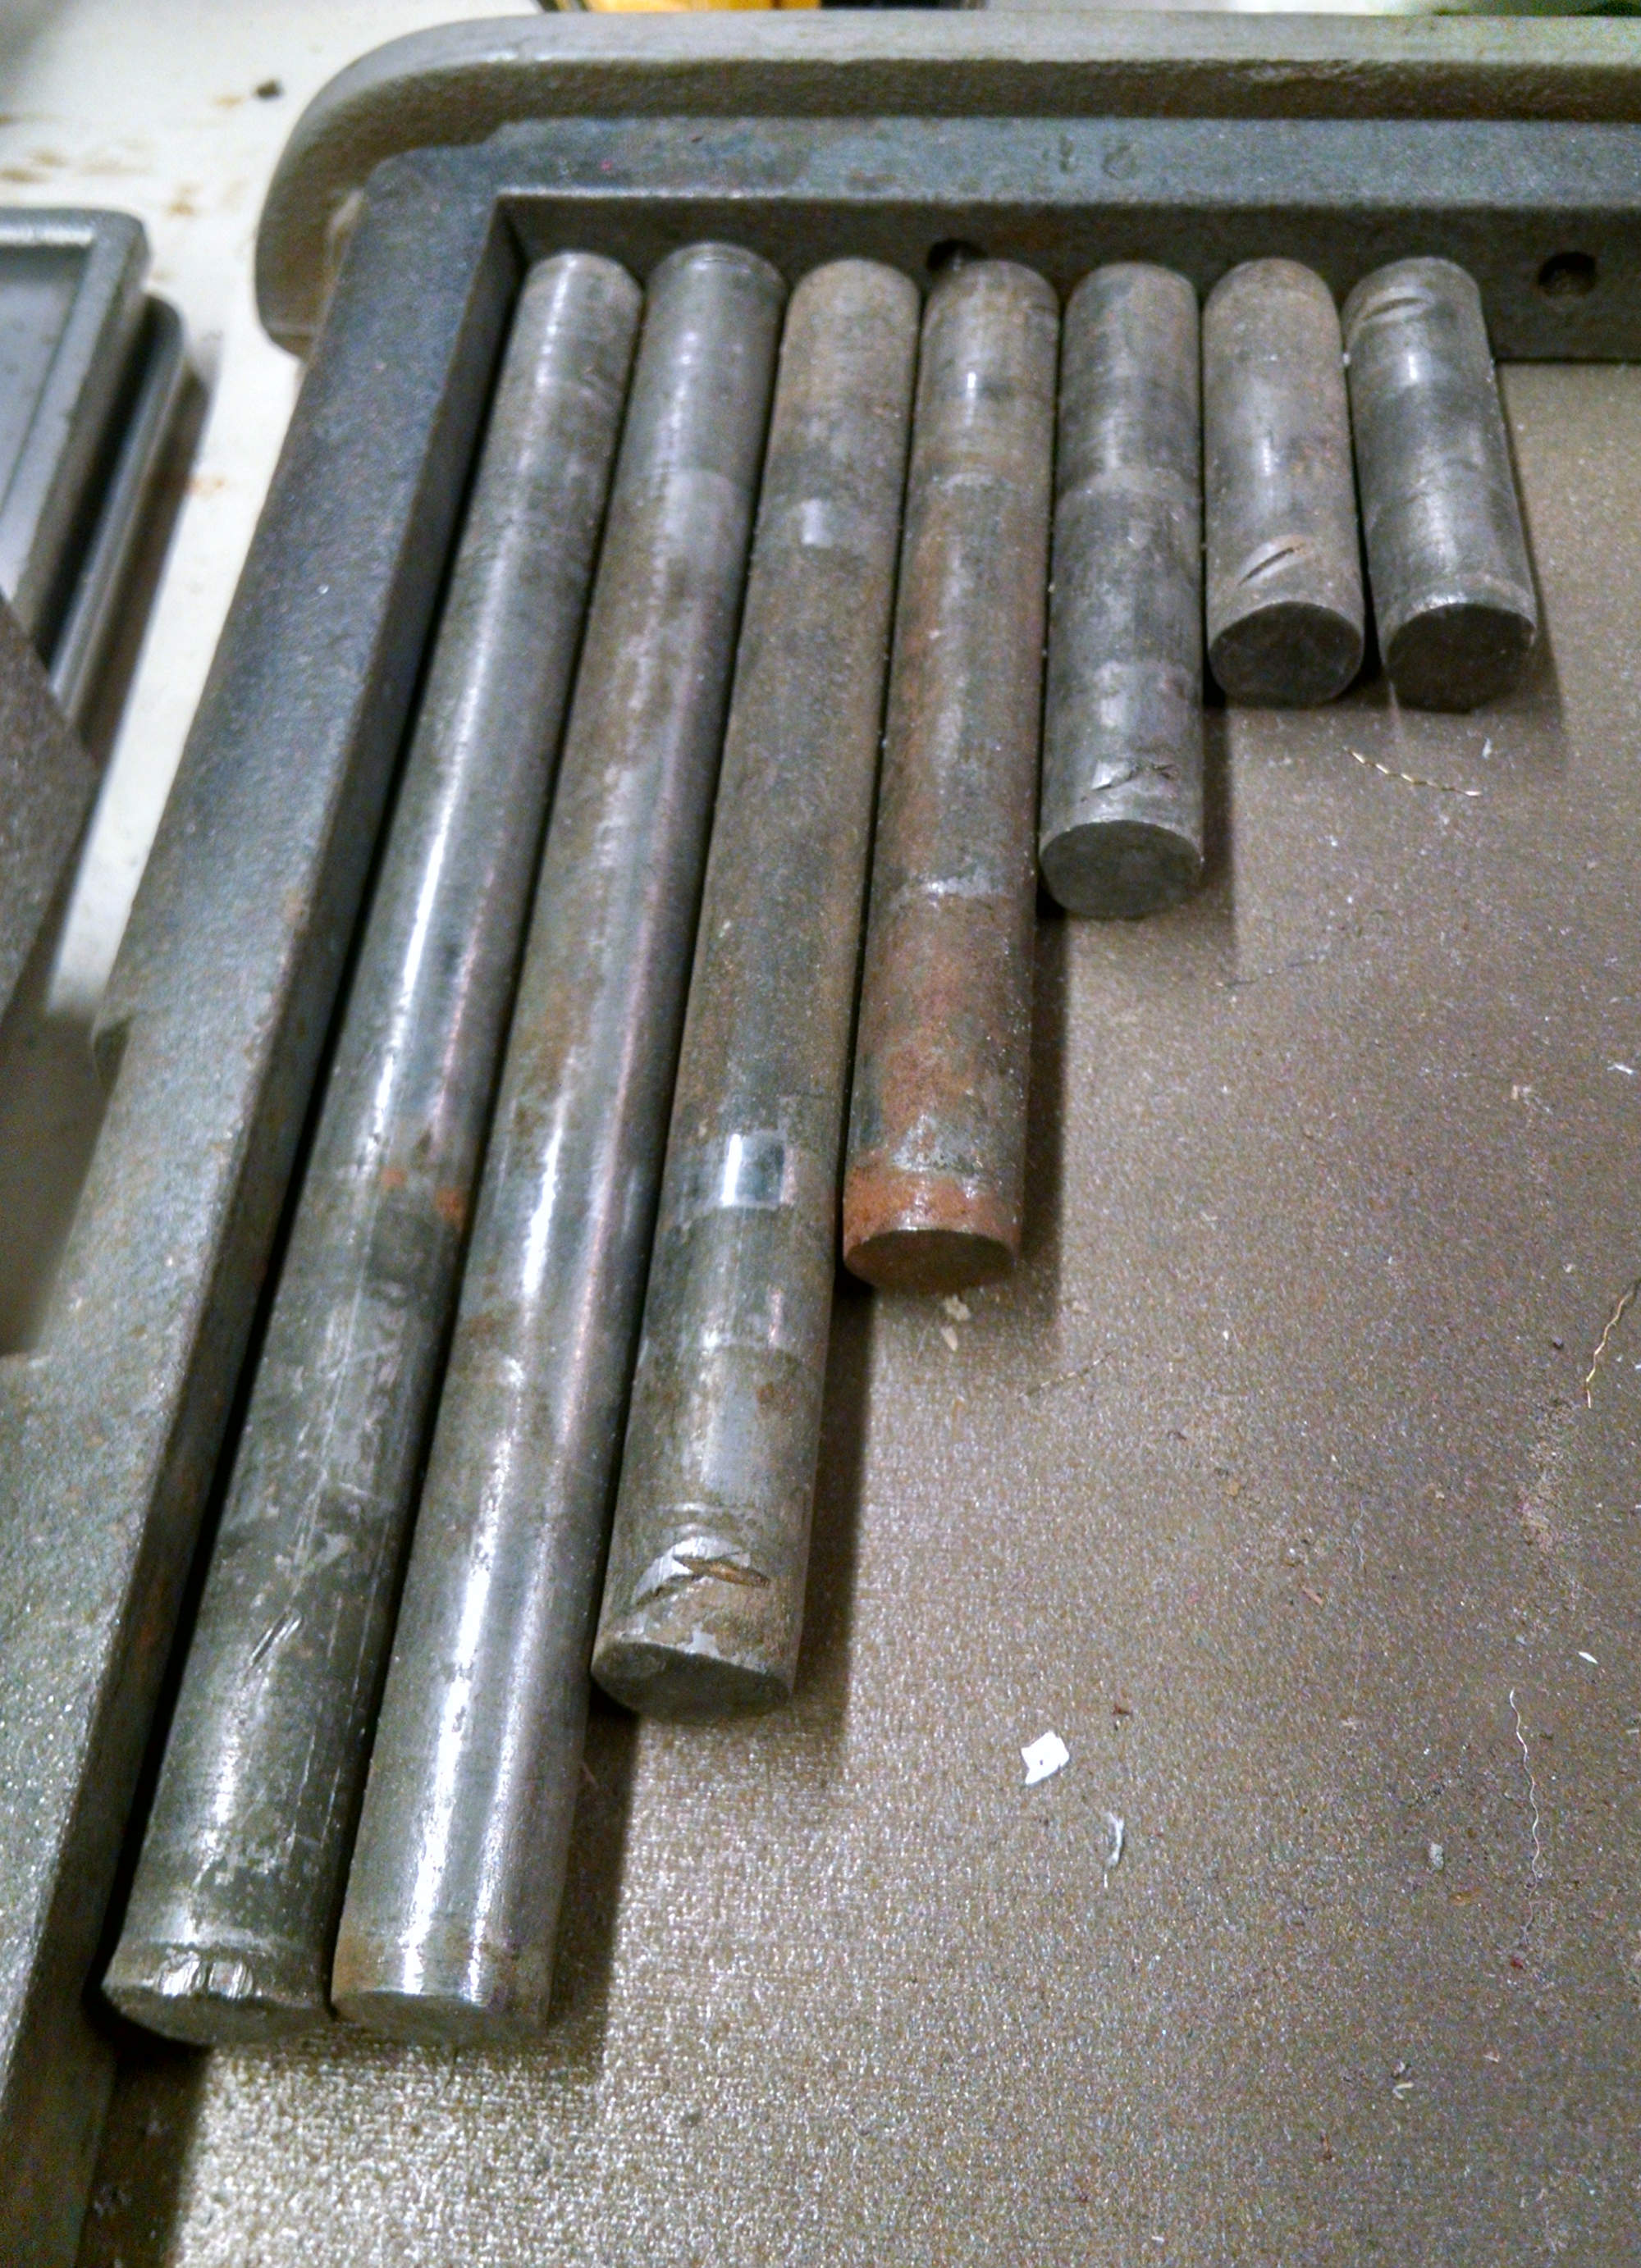 We have cut new stainless steel shafts
and turned them on the lathe to a perfect finish, as
opposed to the originals which were simply rough cut of
common steel bar and driven into the chassis, with one end
nicked or mushroomed to hold them in place. That usually
worked pretty well, but certainly not always. The shafts
we will use will be held in place using spring steel
clips. Our next lathe chore will be cutting the channels
for the clips. These new shafts are cut from 1/2"
stainless steel rod so not only will they last a lifetime,
but, since stainless steel is not as hard as cast iron,
any eventual wear (say, 100 years from now) will show on
the shafts, which will be easily replaceable, and will
preserve the precisely milled shaft holes of the casting
for hundreds of years into the future. We have cut new stainless steel shafts
and turned them on the lathe to a perfect finish, as
opposed to the originals which were simply rough cut of
common steel bar and driven into the chassis, with one end
nicked or mushroomed to hold them in place. That usually
worked pretty well, but certainly not always. The shafts
we will use will be held in place using spring steel
clips. Our next lathe chore will be cutting the channels
for the clips. These new shafts are cut from 1/2"
stainless steel rod so not only will they last a lifetime,
but, since stainless steel is not as hard as cast iron,
any eventual wear (say, 100 years from now) will show on
the shafts, which will be easily replaceable, and will
preserve the precisely milled shaft holes of the casting
for hundreds of years into the future. Update: Pete Wilson - The "Old Kelsey Builder" - who was in charge of production at Kelsey Co. during the 1970s - told me that Kelsey did improve the way they cut and installed shafts in their presses - and found the new, better process to also be easier and less expensive. Later on, they added a variety of end clips to hold the shafts in, but even with no retainer of any sort, most shafts stayed in place for many years. We just like grooves and snap rings... Next: Continued paint prep, cutting slots for the clips, casting a nice set of rollers. And, while the rollers are curing, we'll be cutting new delrin trucks for them and fabricating a new gripper shaft and spring and a set of nice grippers. Then we'll go into the wood shop and make a nice 12x18" base of finished cabinet-grade plywood and, after the finishing has dried, we'll install the reassembled press on its new new base. Once it's on its base, it will be time to begin set up - platen leveling, ink roller adjustment, some light lubrications and some test printing to make sure it's 100% perfect. A lot goes into a proper restoration... "it ain't just paint!" 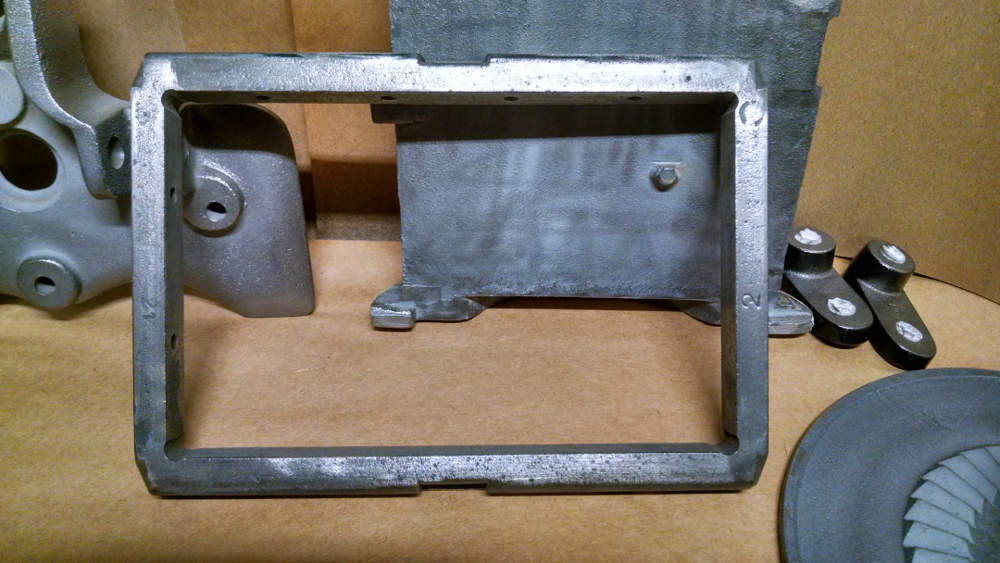 2/4/19: 2/4/19:  But, speaking
of paint... temps rose to 60 outside today, so warming the
paint booth and the parts to a better temperature for
painting - 70-80 degrees - was pretty easy, especially
with the new electric heating pad in the paint cabinet.
The parts shown to the right are about to be painted... But, speaking
of paint... temps rose to 60 outside today, so warming the
paint booth and the parts to a better temperature for
painting - 70-80 degrees - was pretty easy, especially
with the new electric heating pad in the paint cabinet.
The parts shown to the right are about to be painted...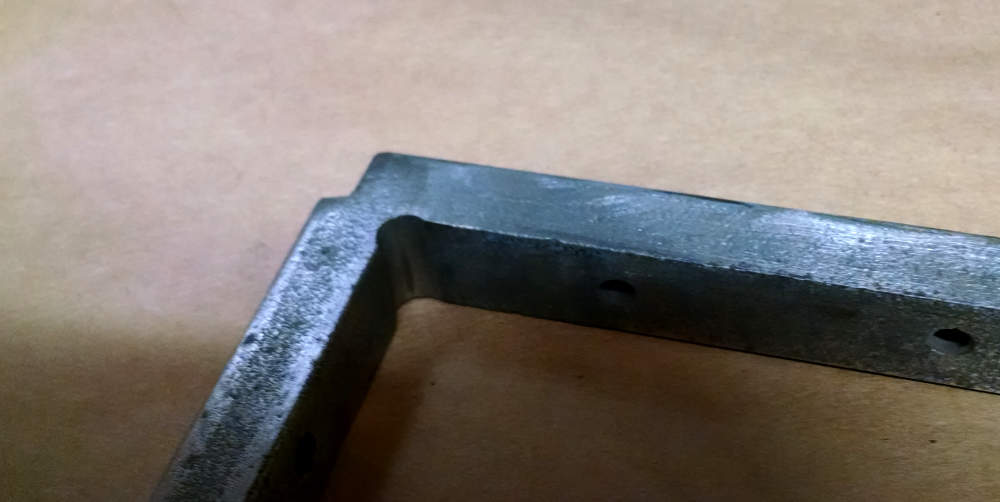 And
speaking parts about to be painted, here's something
special about the chase. Note the inner corners of the
chase in the photo to the left. The have been radiused - not by
Kelsey Co. in 1941, but by us in 2018. The reason we have
done this is to actually strengthen the chase. And
speaking parts about to be painted, here's something
special about the chase. Note the inner corners of the
chase in the photo to the left. The have been radiused - not by
Kelsey Co. in 1941, but by us in 2018. The reason we have
done this is to actually strengthen the chase. It might sound odd - to remove material to strengthen the chase. But it works - and here's the story... While working with the folks at The National Museum of Industrial History last year, I was exposed to quite a few retired engineers who volunteer at the museum. They loved stopping by the printing exhibit to admire our old presses and the working Linotype. One afternoon, while three of them were visiting "The Printery", we were comparing a 5x8 Kelsey chase with the chase from a 10x15 Chandler & Price. The C&P chase was radiused on the inside of each of the corners. The Kelsey chase was not. The engineers all laughed and explained to me that the inner corner radius was there to disperse the energy and that radiusing the inner corner actually strengthens the corner. Apparently, this is something well known to engineers, but not to printers - or the Kelsey Company in 1941. update: However I did just come across a radiused Kelsey 6x10 chase. I guess they did radius some of them at one time... I once broke a Kelsey chase while locking up a form - and I have seen quite a few that were welded or brazed to repair such a corner break, so I know that they can fail. As a result of gaining this new knowledge, we have radiused the corners of this chase to prevent such a sad occurrance any time during the estimated 100-200 years (or more) of its future. note: Kelsey may have felt that radiusing the corners of a chase that is locked up using the relatively low force applied with grub screws would not be necessary. That makes perfect sense to me. But when some enterprising young printer puts a quoin into that chase, it can exert a lot more force than a few set screws do. 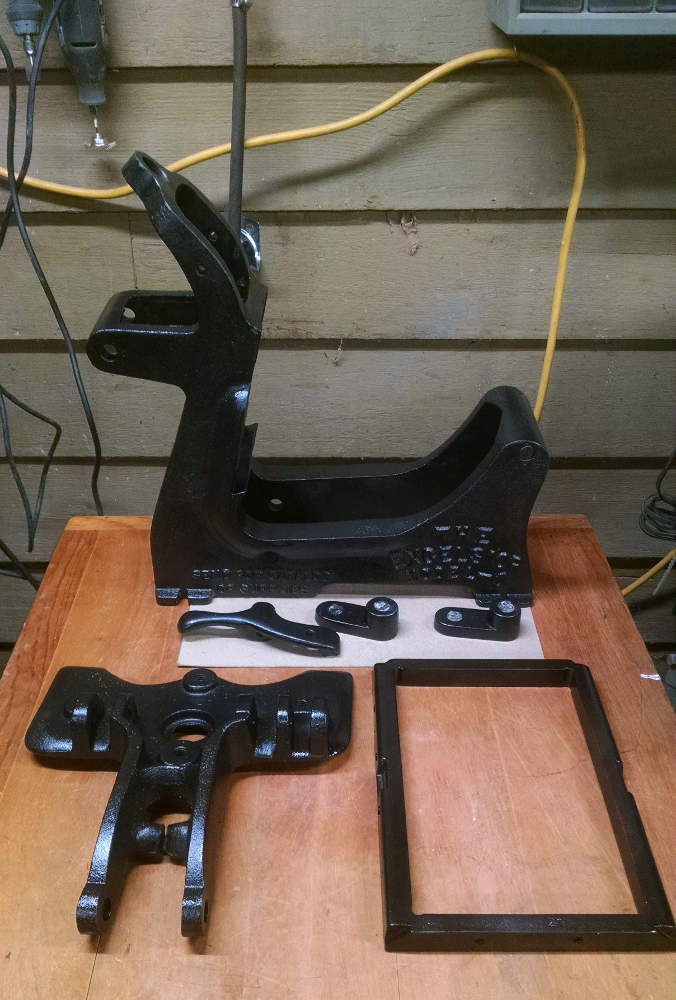 And now the painting
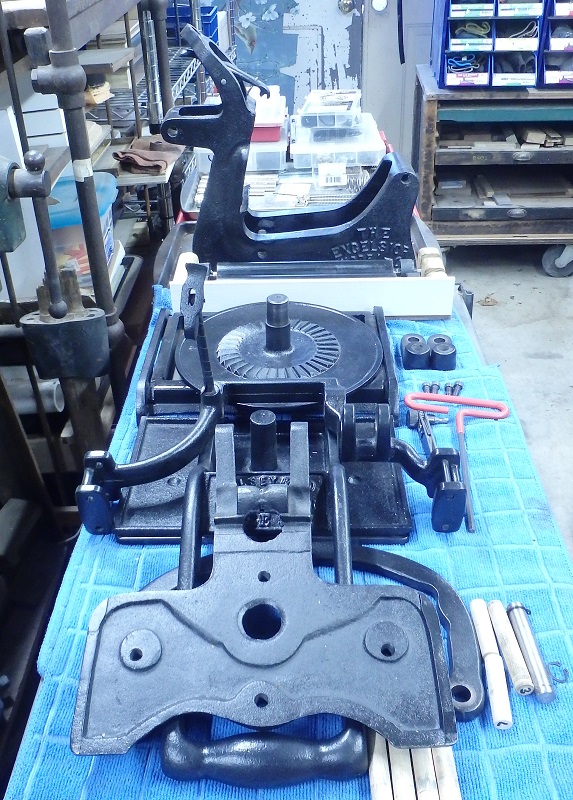
begins... And now the painting
begins...To the left are the main chassis, the chase latch, the doglegs, the platen holder and the chase - nicely painted a medium semi-gloss black.  The mounting holes on the bottom of the base have also been "rounded" a bit - to make for a better fit of the 1/4x20 bolts that will fasten the press to its new base. Kelsey never did this, and the result is that most presses have slots that are uneven and not round, making it difficult to properly mount the press on a board. By rounding the holes, we will have a more secure mount on its new 12x18" maple mounting board. OK. There are still more parts to be prepped and painted, so it's back to the work shop for now.... 2/22/19 - Friday OK. After a too-long delay, we are back to work on this press. 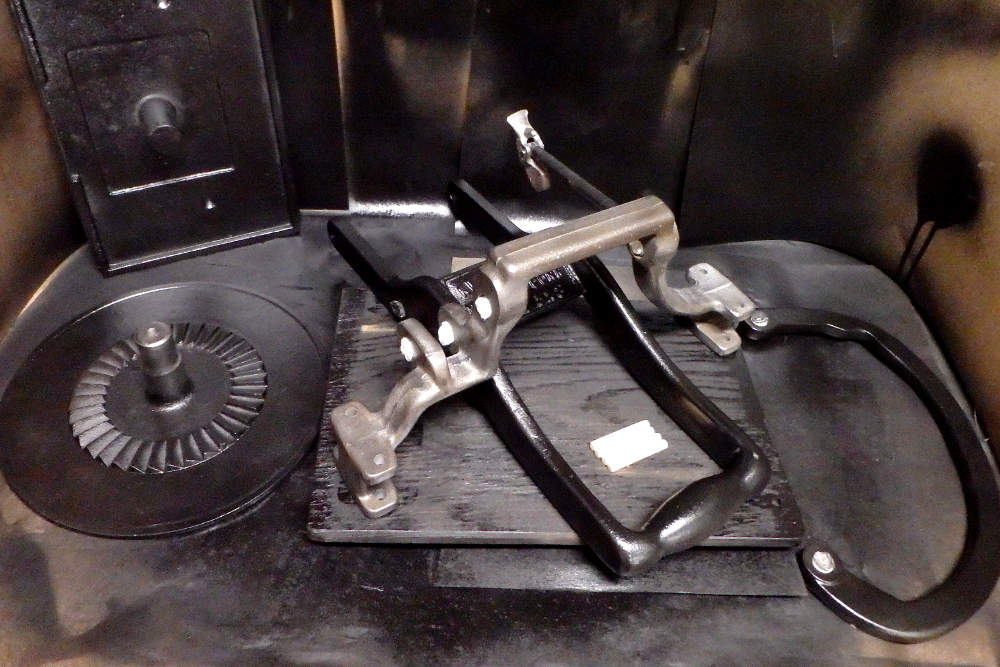 Today, we painted all but
one of the remaining pieces. We use a rotating table to
make sure we apply paint from every angle. And, to protect
the bearing surface inside of any holes in the castings,
we fill them to keep paint out. For all large holes, we
stuff them with rolled-up paper towels. For the 1/4"
holes, we use wooden dowels. Today, we painted all but
one of the remaining pieces. We use a rotating table to
make sure we apply paint from every angle. And, to protect
the bearing surface inside of any holes in the castings,
we fill them to keep paint out. For all large holes, we
stuff them with rolled-up paper towels. For the 1/4"
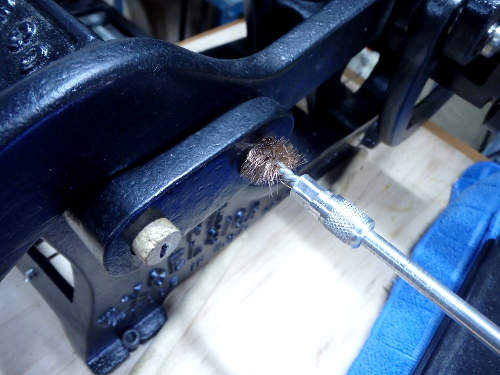
holes, we use wooden dowels. 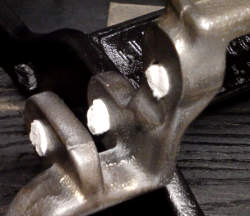 AND, one more trick taken from our friends at Chandler & Price... On their large presses, they cut a slot into the mounting piece for the ink disk. This slot is to encourage and enable regular oiling of the ink disk shaft. Since we have encountered many Kelsey presses with stuck or slow-moving ink disks, it appears that these shafts are not being oiled as they should be. 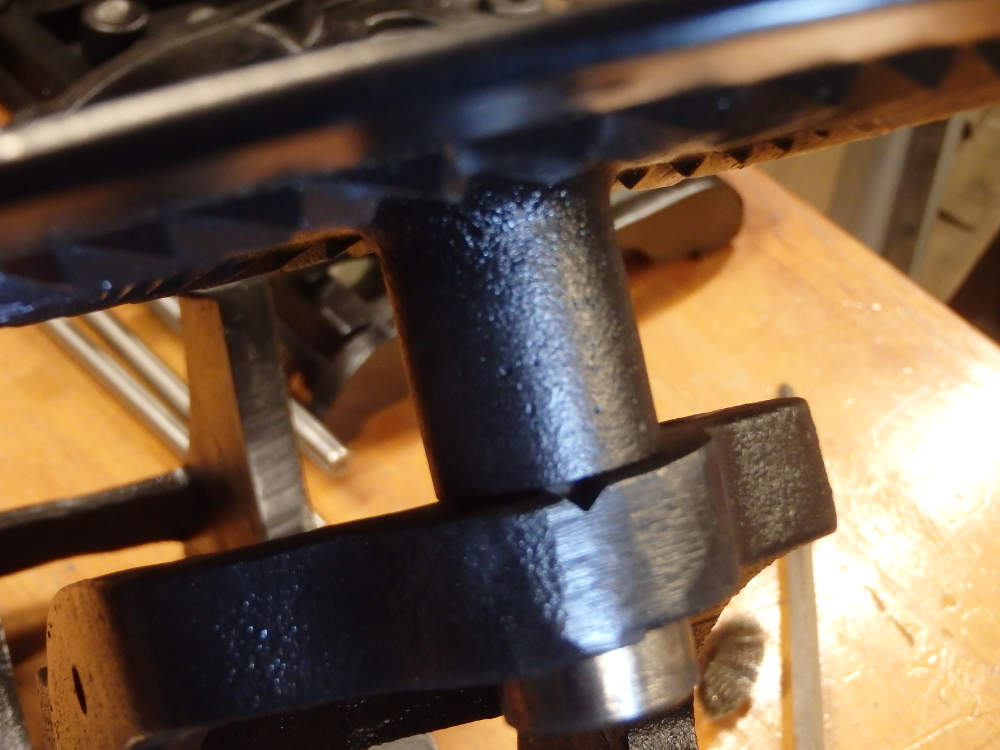 Well, with our new feature, (see the small nick on the bracket in the photo on the
right) this problem may be an issue of the past.
We have cut a small channel into the back of the disk
mount to indicate where a drop of oil should be placed.
This little channel will also assure that the ink goes to
the place where it is needed most - directly to the shaft. Well, with our new feature, (see the small nick on the bracket in the photo on the
right) this problem may be an issue of the past.
We have cut a small channel into the back of the disk
mount to indicate where a drop of oil should be placed.
This little channel will also assure that the ink goes to
the place where it is needed most - directly to the shaft.
We'll be adding these features to all future restorations. 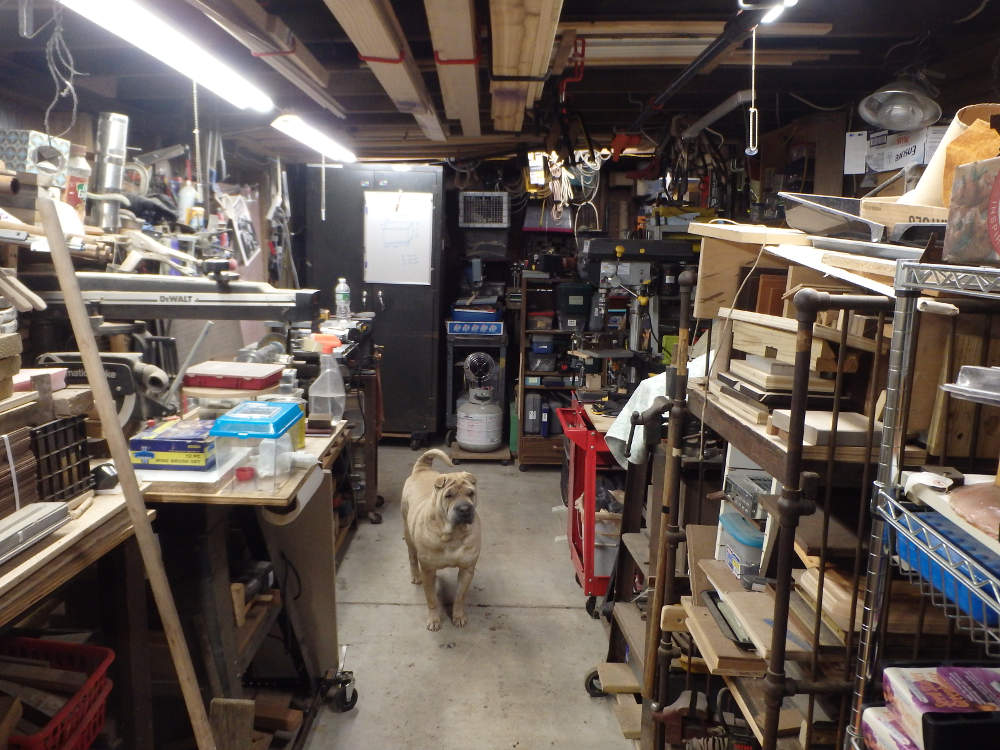 ...and now - the last
photo from today is of the cluttered work shop itself -
complete with my assistant, Mr. Bo Jangles - a rescued
Sharpei who joined our family a few years ago. Bo spends a
lot of time in the shop - and in the yard - and in the
woods, and he always has a tail ready to wag and a gentle
bark used to greet anyone who wanders onto his land... ...and now - the last
photo from today is of the cluttered work shop itself -
complete with my assistant, Mr. Bo Jangles - a rescued
Sharpei who joined our family a few years ago. Bo spends a
lot of time in the shop - and in the yard - and in the
woods, and he always has a tail ready to wag and a gentle
bark used to greet anyone who wanders onto his land...Next, we'll paint that last part, then begin reassembly of the press, cast new ink rollers for it, and prepare a nice maple base to mount it on... 2/25/19 - Monday 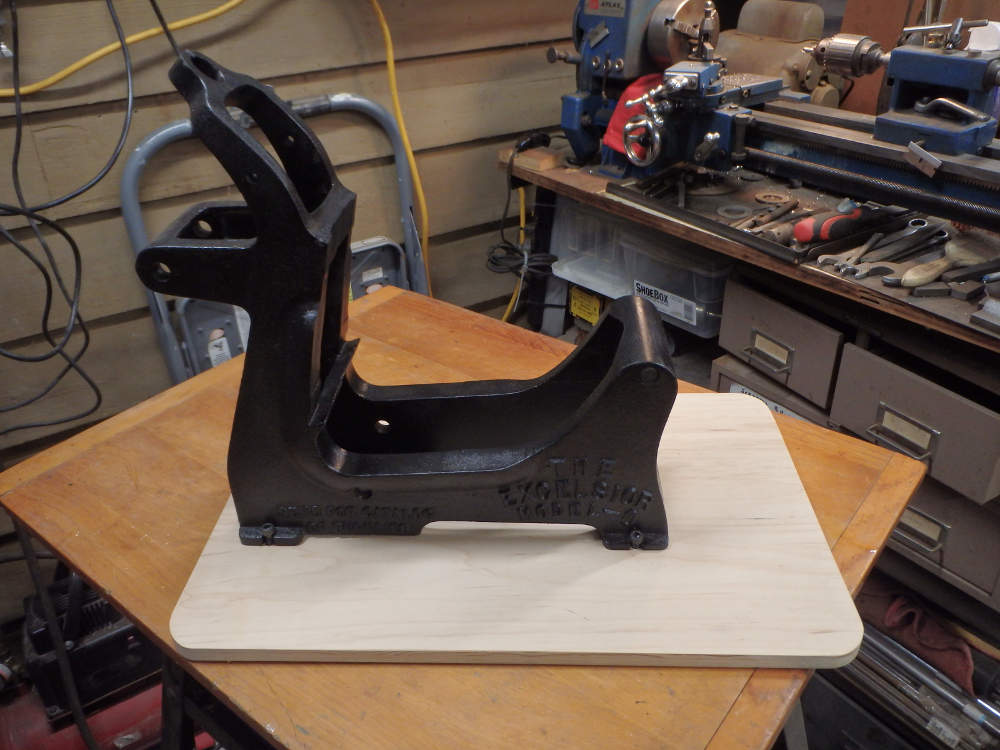 Still
a lot to do, but it's coming together. The
painting is all done. The base is made, corners rounded,
marked and drilled for the mounting bolts. Still
a lot to do, but it's coming together. The
painting is all done. The base is made, corners rounded,
marked and drilled for the mounting bolts. 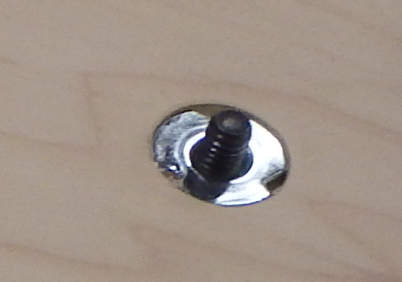 In
fact, the main chassis of the press is bolted to it, using
counter-sunk t-nuts that will never come loose like screws
might as this press is carried from place to place during
the traveling exhibit. In
fact, the main chassis of the press is bolted to it, using
counter-sunk t-nuts that will never come loose like screws
might as this press is carried from place to place during
the traveling exhibit. 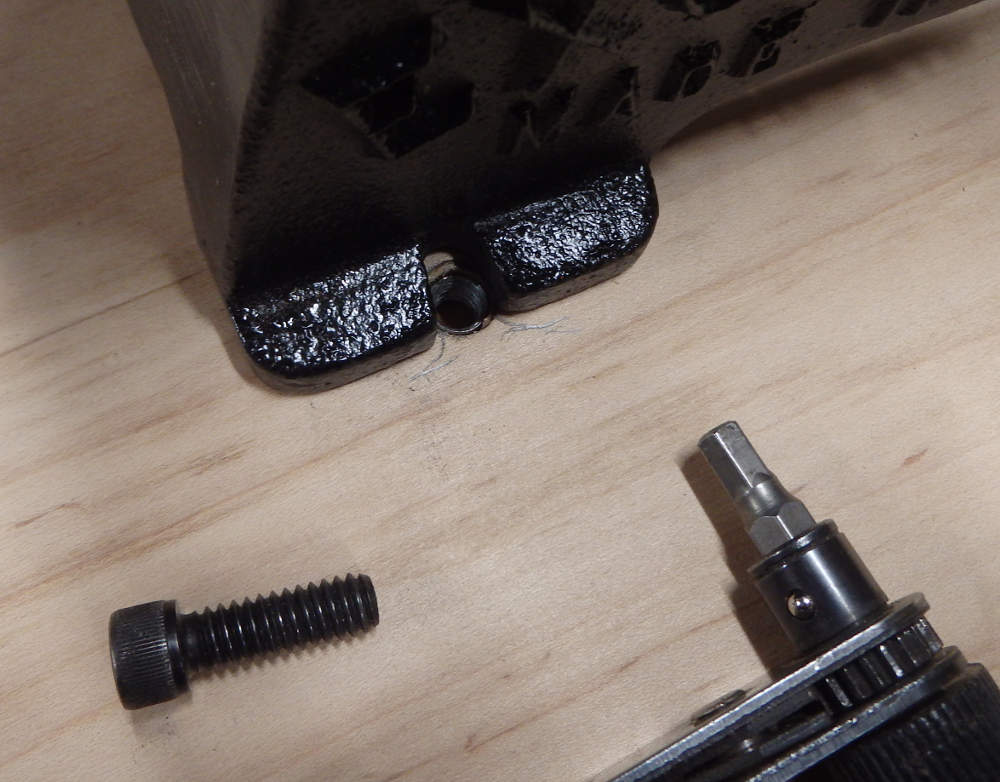 We'll remove the
chassis later to do a final sanding and staining and
varnishing of the maple base, and will install handles
front and back, but this is how it will go together. We'll remove the
chassis later to do a final sanding and staining and
varnishing of the maple base, and will install handles
front and back, but this is how it will go together. The extra work put into rounding the insides of the mounting tabs made positioning and mounting the bolts much easier than dealing with the rough castings as we did in the past. 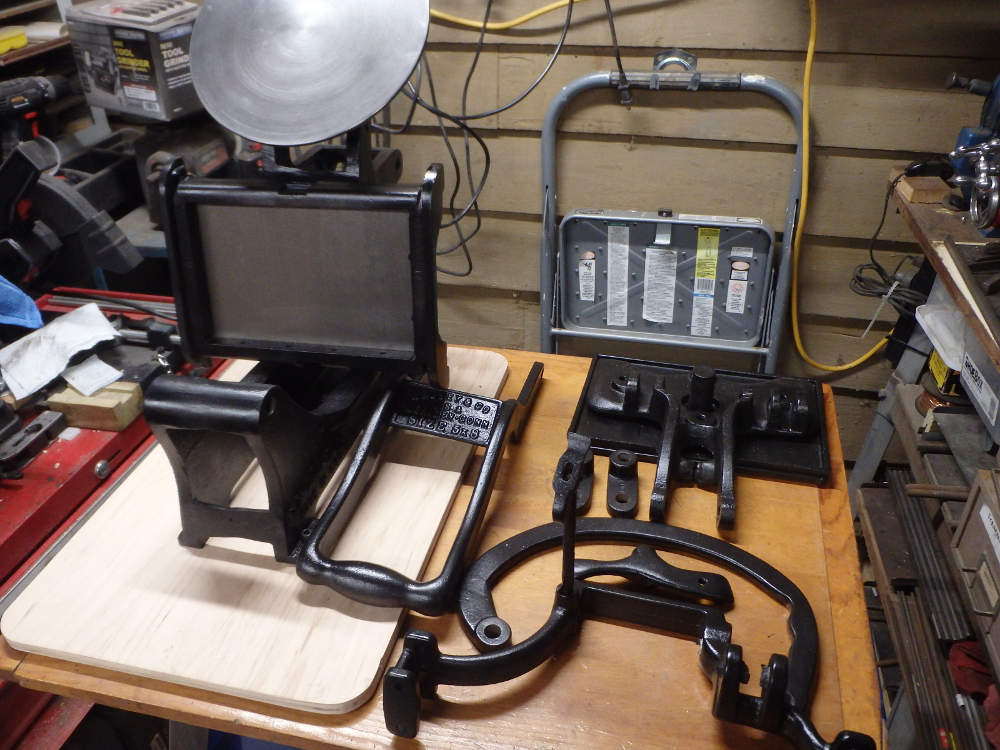 And now, with the main parts
waiting to be assembled onto the chassis, it's actually
beginning to look like a printing press! Next, we'll be
casting the rollers & making the roller trucks. While
the rubber rollers are curing, we'll cut grooves into the
shafts and begin assembly. We'll remove the press, sand
and finish the base, then make the new gripper bar and
spring, add the roller hooks, mount the rollers, set the
platen level and roller height and begin some printing! And now, with the main parts
waiting to be assembled onto the chassis, it's actually
beginning to look like a printing press! Next, we'll be
casting the rollers & making the roller trucks. While
the rubber rollers are curing, we'll cut grooves into the
shafts and begin assembly. We'll remove the press, sand
and finish the base, then make the new gripper bar and
spring, add the roller hooks, mount the rollers, set the
platen level and roller height and begin some printing!Rounding the corners of the maple base 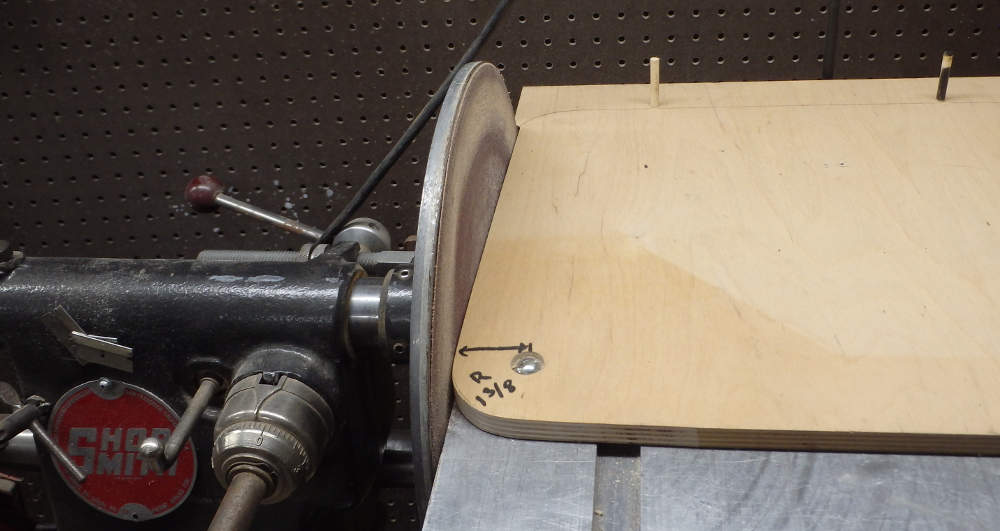 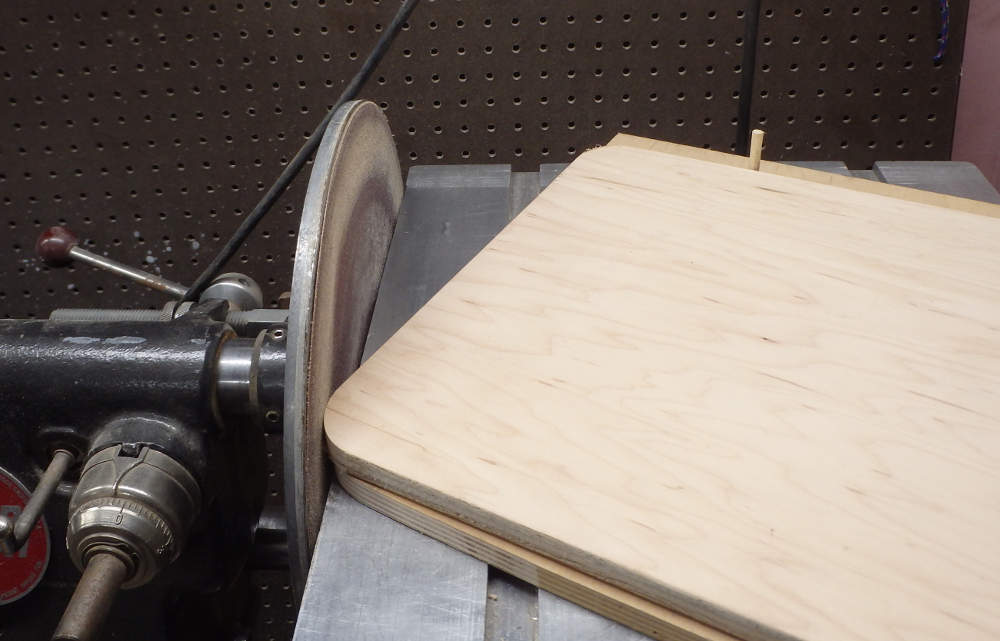 We devised what we feel is a pretty clever little jig for rounding the corners of the base. Rather than pull out the router or cut radiuses on the band saw, with this attachment to the Shop Smith, we can simply mount the board and rotate it to get a perfect 1 3/8" radius on all four corners. No measuring, no cutting. No muss, no fuss... Just nice, smooth round corners, quickly, easily and consistently. We're so proud of this process that we've posted a video of it on our Youtube channel. We got some really spiffy - simple, but classy - steel rod handles to install on the front and back of the base.This press will be portable. Handles will help, and these are both strong and attractive (see finished base below) Due to considerations of temperature (19 degrees outside tonight), we are pre-warming the roller casting tubes and roller shafts so that they will be at 70 degrees when casting begins. 3/15/18 - Friday [photo of Delrin Locking Truck] 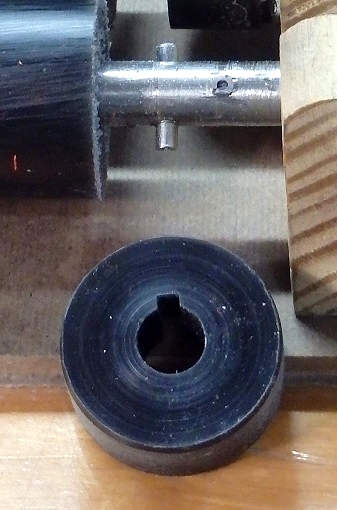 The ink
roller shafts have been cut, turned and drilled to accept
pins that will lock the trucks into place on the shaft and
prevent the trucks from moving too close to the rubber as
the rollers go up and down. The ink
roller shafts have been cut, turned and drilled to accept
pins that will lock the trucks into place on the shaft and
prevent the trucks from moving too close to the rubber as
the rollers go up and down. The new Delrin trucks have been turned and drilled and reamed to fit the roller shafts perfectly. A channel has been broached on the inside of each truck to allow them to slide over the locking the pins, then lock into place on the shaft like on the big presses. Big platen presses generally had shafts that had been "pinched" to raise a bit of steel which their trucks would lock onto. We can't pinch the steel, but we can drill holes and insert spring-steel roll pins that serve exactly the same purpose. Kelsey chose not to lock their trucks to the shaft like it is done on larger platen presses. Like most table top press manufacturers, they allowed the trucks to roll free - independent of the roller. It's easier - and cheaper and faster - to do it that way - and it may not really make a lot of difference on a small table top press, but we think that this way is better. The problem with free-wheeling trucks is that it's contact with the form that drives the rollers, and when those inky rollers make first contact with the top edge of the form - whether an engraving, photo-polymer plate or a piece of type - it can smear the ink on the leading edge. This is a problem known as slurring - and is usually overcome by use of roller bearers - to drive the rotation of the rollers using a thick solid line on the side of the form to make the rollers... roll. With locked trucks, roller bearers - and the complications they introduce to small press work - are less often needed - as long as the rails are kept clean and dry and the roller spring tension is just right. The spring tension of the roller hooks can be difficult to achieve on a basic Kelsey design style press. The knurled nuts make it easy to tighten or loosen the springs to adjust the pressure. As has been done with cast rollers for well over a hundred years, the roller shafts have been wrapped with cord, which is glued in place to 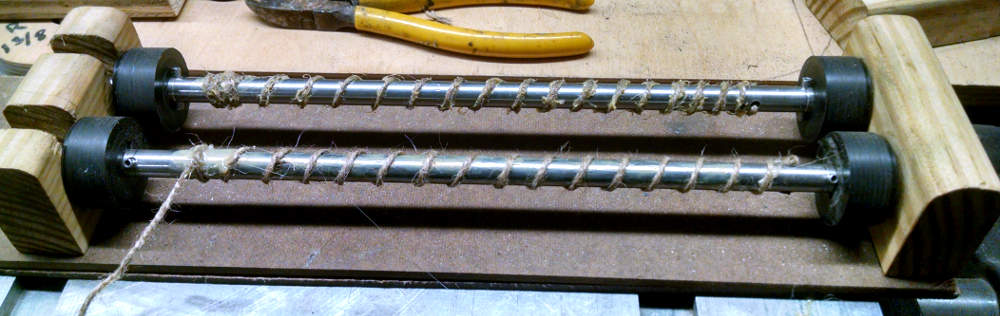 give
the liquid rubber a bonding surface as it cures so that
the rubber will never slip on the roller shafts. give
the liquid rubber a bonding surface as it cures so that
the rubber will never slip on the roller shafts. 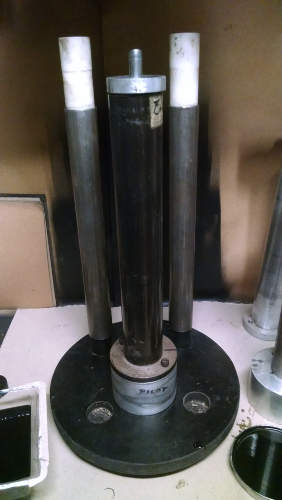 For this press, we are casting a set of 20-Durometer Polyurethane rubber ink rollers - Two cups of liquid rubber was mixed, 3 drops each of red, blue and black dye were added to the mixture to give our rollers their distinctive "20-durometer" color and it was poured into the prepared molding tubes this afternoon. Tomorrow, we will remove and inspect the rollers. We'll let them cure for another day or two and then, when the rest of the press is assembled, we'll put them on, ink them up and begin printing! I can hardly wait.... 3/20/19 - Wednesday  Well, no more waiting. The rollers cast
well and they have cured for a few days. The excess rubber
has been trimmed off in the lathe. These rollers are ready
to mount onto the press. Well, no more waiting. The rollers cast
well and they have cured for a few days. The excess rubber
has been trimmed off in the lathe. These rollers are ready
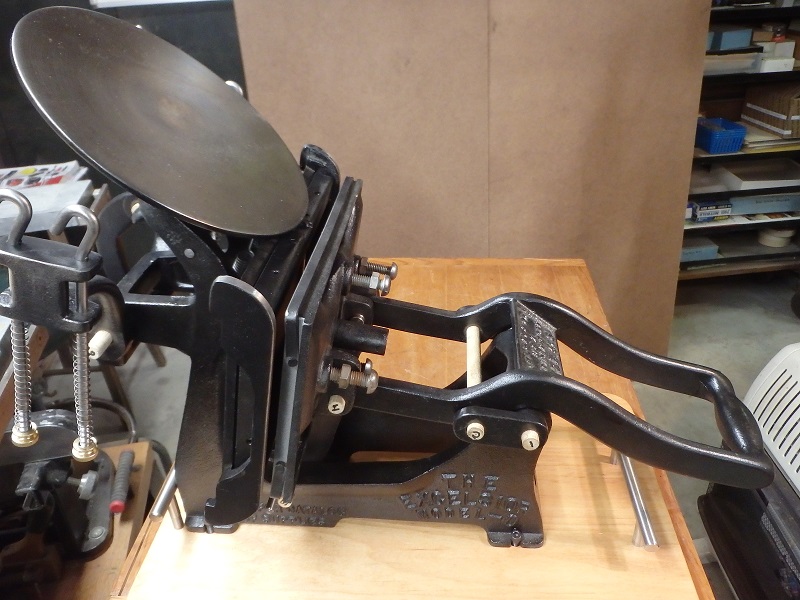
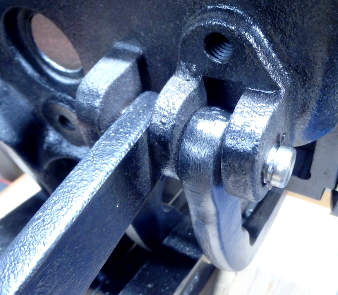
to mount onto the press.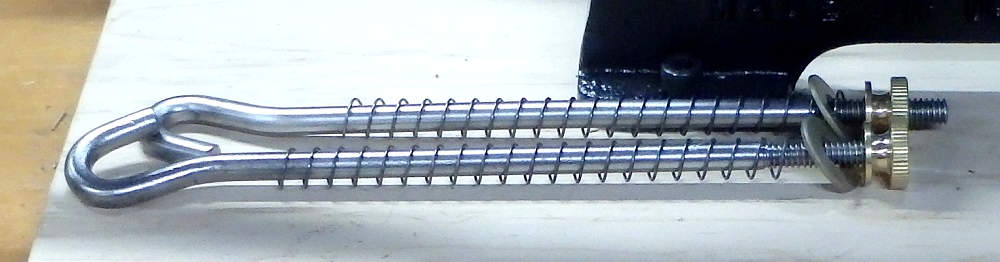 The roller hooks are ready to install as well - with their spiffy new thumb screws for adjusting ink roller pressure. Two of the four are shown here. 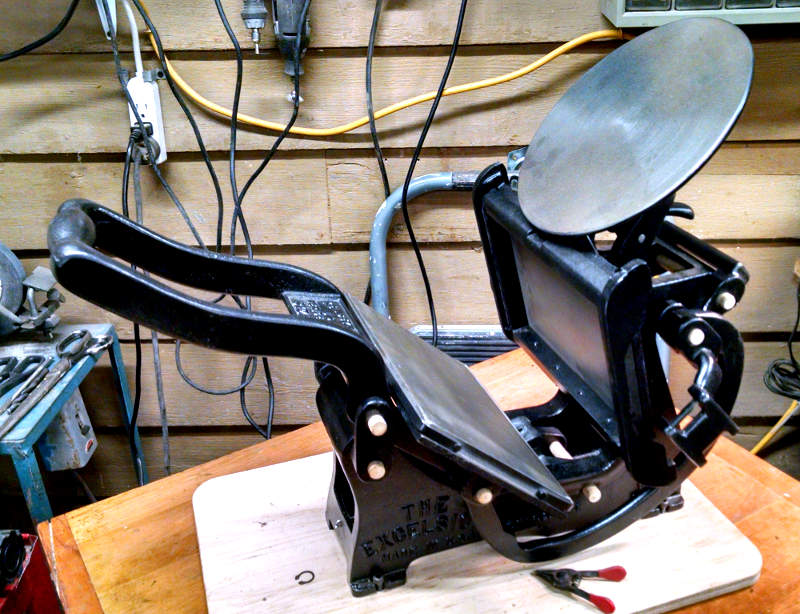 And now, with the main parts fitted
together using wooden dowels, it's beginning to look like
a working printing
press. And now, with the main parts fitted
together using wooden dowels, it's beginning to look like
a working printing
press. Next step will be to replace the wooden dowels with the stainless steel shafts that will be grooved to accept snap rings to hold them in place for the next 100 years or so... The photos below show the way we polish the bearing surfaces and install the stainless steel shaft, locked in place with a snap ring. Once all of the shafts are installed, we'll make a new gripper arm shaft and install it and the new gripper arm spring. We'll install the grippers themselves during set-up and adjustment for test printing. 3/21/19 - Thursday 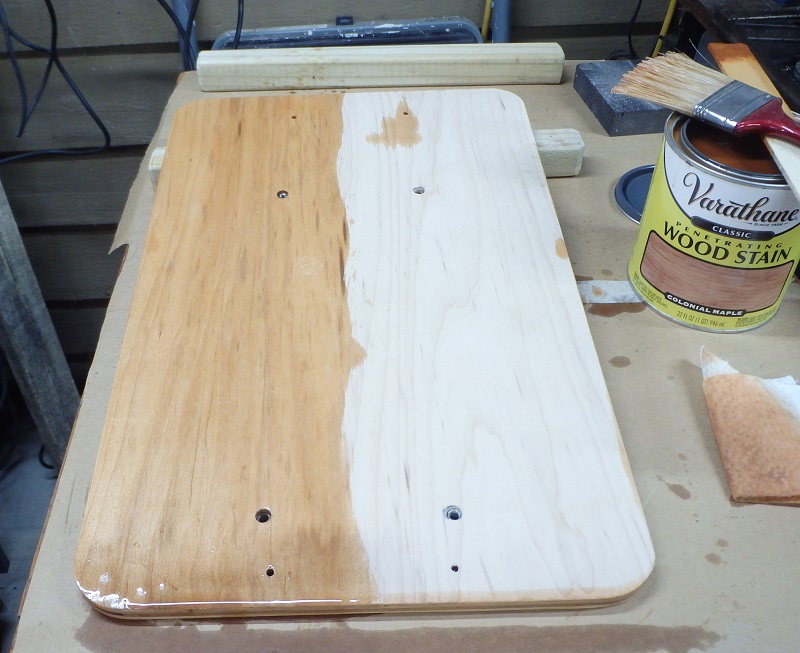
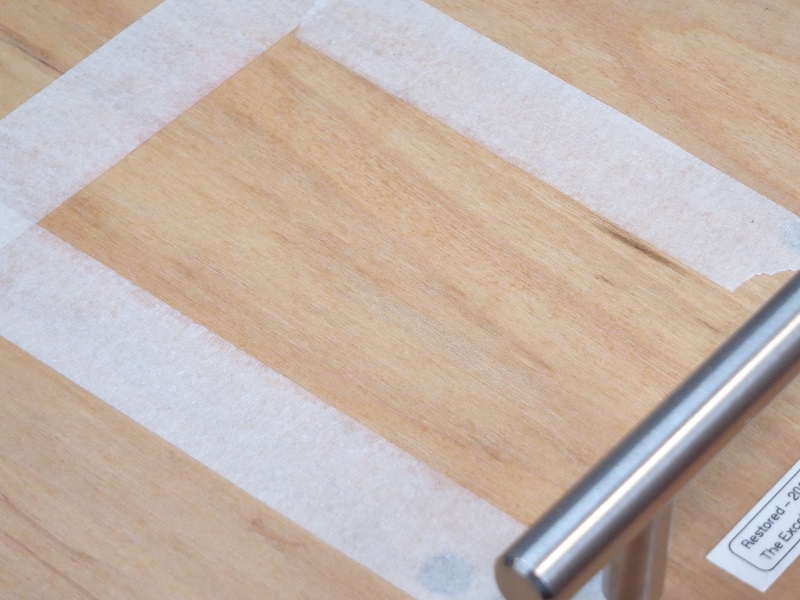
 Well, before we replace the wooden
dowels with the machined stainless steel shafts, we have
to prepare the base, so today was a day dedicated to the
Maple base that this press will be mounted on. The press
was disassembled and the parts set aside. Maple stain was
applied to the maple wood. Note how the color deepens... Well, before we replace the wooden
dowels with the machined stainless steel shafts, we have
to prepare the base, so today was a day dedicated to the
Maple base that this press will be mounted on. The press
was disassembled and the parts set aside. Maple stain was
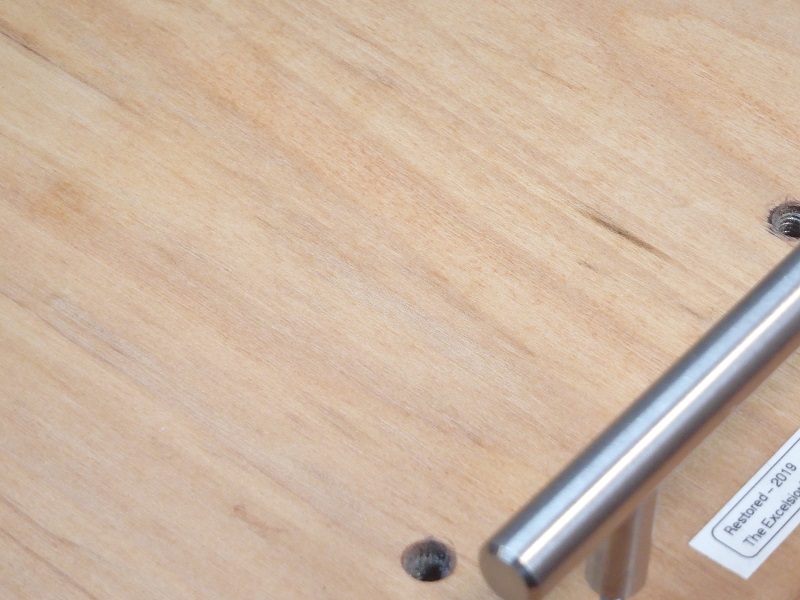
applied to the maple wood. Note how the color deepens...Since this press will be mobile, we found some really stylish handles and mounted them to the base for easy handling. We positioned the handles and drilled and counter-sunk mounting holes. The handle to the rear of the press will be raised to allow clearance of fingers beneath it and above the press base. 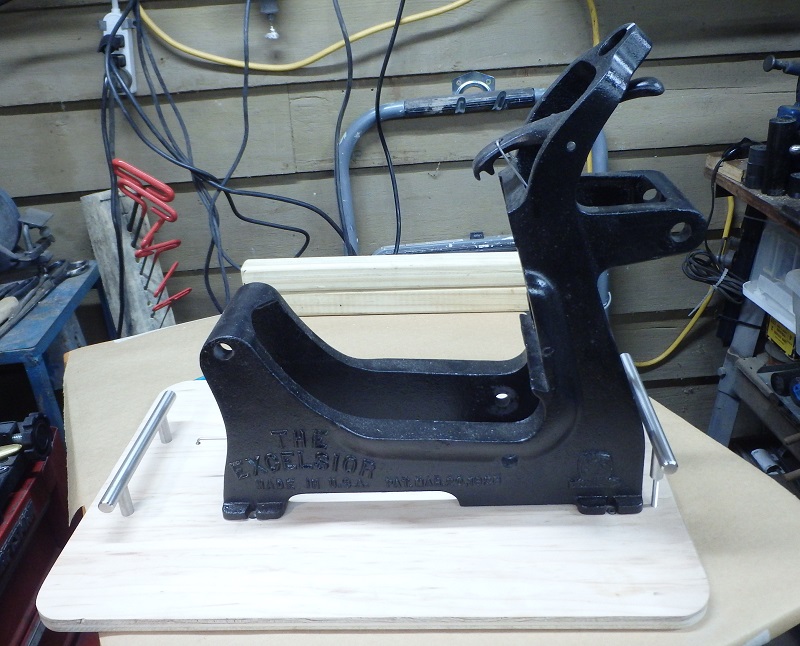 After two applications of maple stain and three applications of polyurethane protective varnish, the base is ready to spend the night in the warm, dry paint booth. 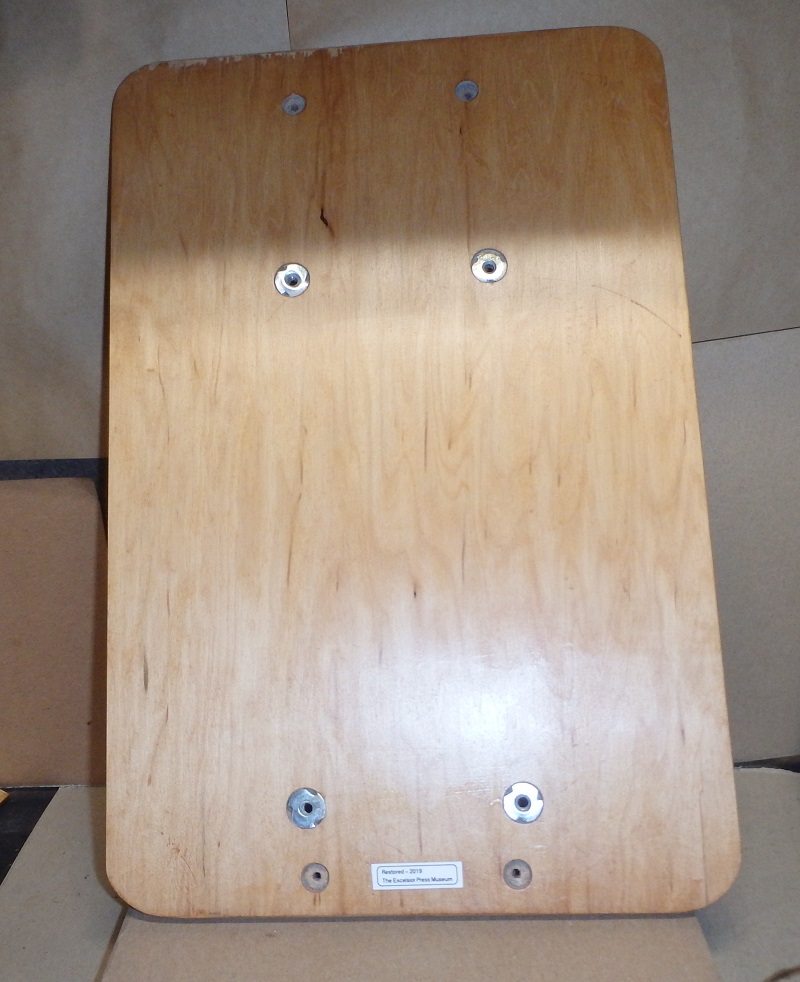 In the morning, we'll go
over it one more time with steel wool, then wipe it down
and finish with some oil. Then we will mount the press
chassis and begin the final assembly with the new shafts. In the morning, we'll go
over it one more time with steel wool, then wipe it down
and finish with some oil. Then we will mount the press
chassis and begin the final assembly with the new shafts.
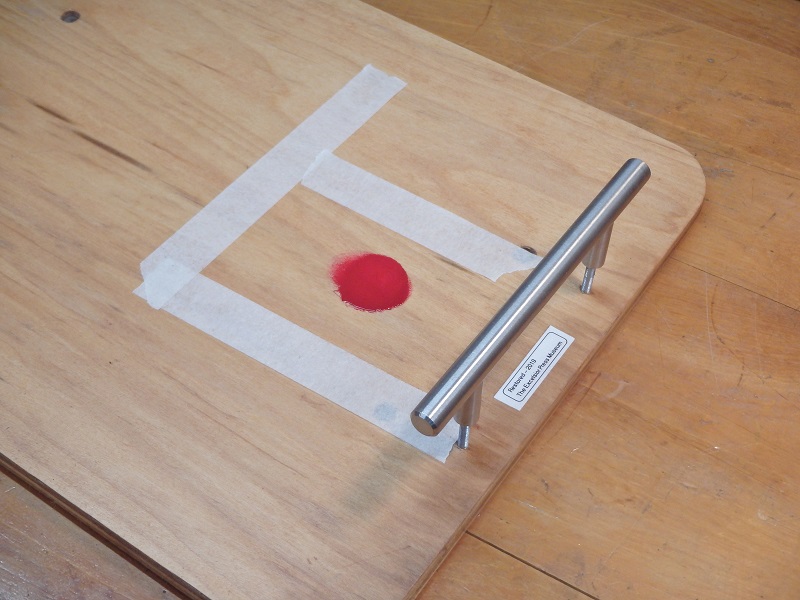
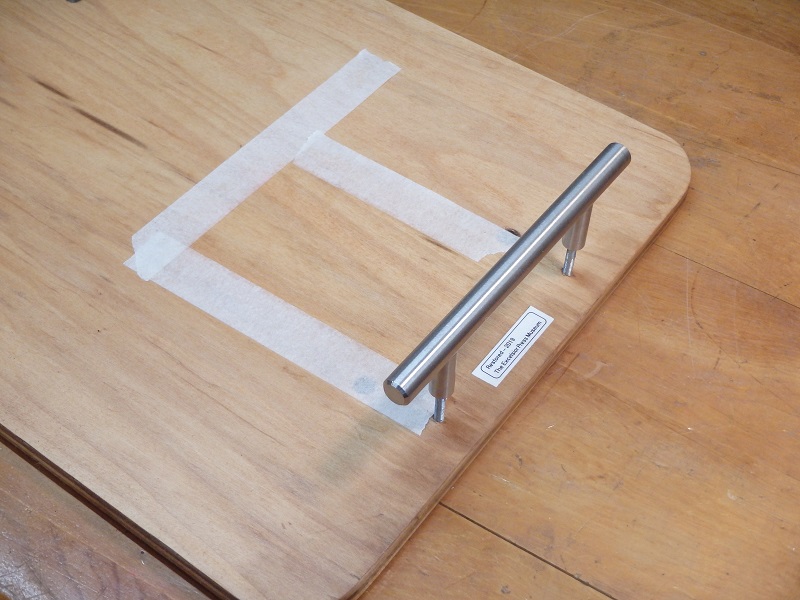
We have also oiled some of the bare steel as well as some of the painted press parts using mineral oil. The mineral oil will protect the bare steel and make the painted surfaces really shine. 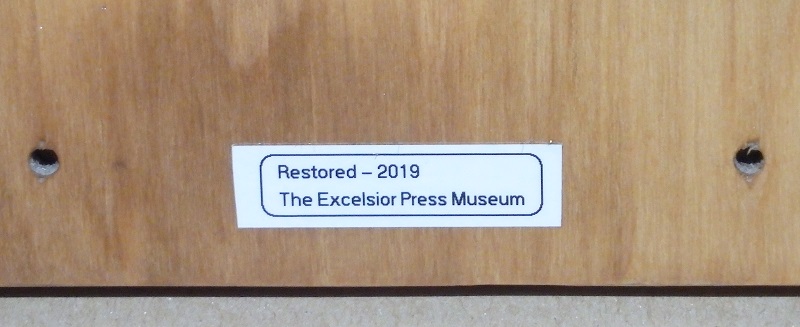 And, in case anyone was wondering if we are proud of our work on this restoration... I had wanted to get an engraved metal plaque, but I think this label printed on our computerized P-Touch Label Printer will do. I just hope that laying varnish over top of the already plastic-coated printed label will protect it and keep it on the base. We'll see how it holds up to a lot of handling... Now we're ready to finish the shafts and put it all together and get ready to print. 3/22/19 - Friday  Today,
we finished the base, and installed the front and rear
handles. Today,
we finished the base, and installed the front and rear
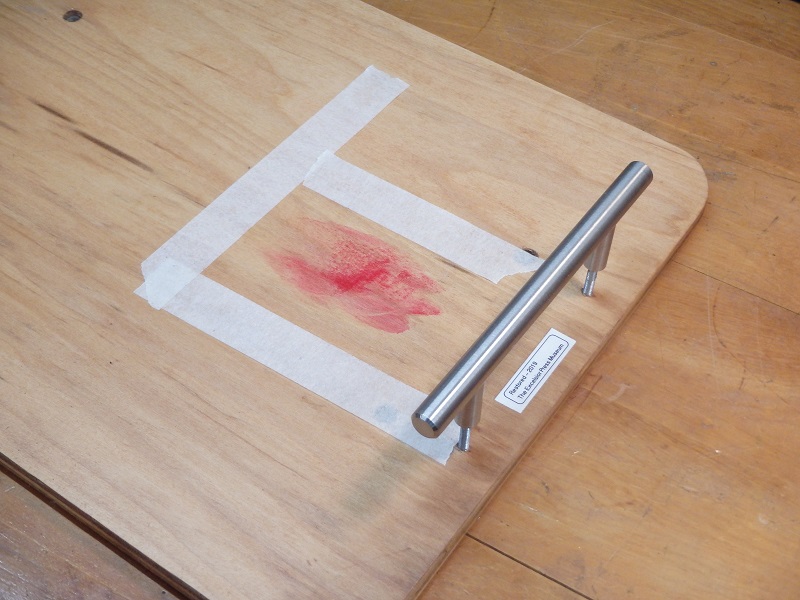
handles.We used some 3/8" rod to match the handles, cut and drilled the rod on the lathe and installed the spacers on rear handle to raise it up 7/16" to give some extra clearance where it was obviously needed. INK CLEANUP TEST The base sat in the warm paint booth overnight to dry thoroughly. With 2 coats of maple stain & 3 coats of polyurethane varnish, it should be easy to clean when ink drips onto it... So, a final steel-wool rubdown, then the ink cleaning test...
 After the ink clean-up test, we reassembled the press on the finished base and began replacing the wooden dowels with machined shafts. The shafts we had initially cut are a bit short to allow for the ring clips, so we're making a new set... that will fit perfectly. This photo shows the numbered wooden dowels. Each shaft is a slighly different length, and there are seven of them, so numbering makes it easier to keep track of them and document the precise lengths needed. As soon as the new shafts are installed and clipped into place, we'll adjust the platen to level, add the rollers & adjust them for perfect inking height, add ink, mount some tympan paper, insert a form, set the gauge pins... and begin printing. 3/24 - Sunday
3/25/19 - Monday Finished! The press is back together again and ready to set up and print!!
3/26/19 - Tuesday - DELIVERY DAY!!!  Yup.
The press was delivered
to UPenn this afternoon - to Lynne, director of
the UPenn Rare Books & Manuscripts Library in
Philadelphia. Yup.
The press was delivered
to UPenn this afternoon - to Lynne, director of
the UPenn Rare Books & Manuscripts Library in
Philadelphia.  The project is completed and the press is delivered. Now, on to the next project. This one has been fun, but sure did keep me tied up far longer than I had hoped. So it's almost time to close the book on this blog. There will be updates as UPenn installs this press in the mobile van printing studio they will use, and hopefully some samples of the work printed on it, but my work is done. I have restored yet another Excelsior Press to "better than new".. But first, one more update; one more video... and one more reason that this press is, indeed, "better than new"... Last night, I was puzzling over the stiffness of the press and the amount of force that was needed to open the press as the rollers came down off of the ink disk and onto the chase bed rails.  I knew it could be better - but what was the solution? Aha! Then I remembered the box of ink disk shims I had in the other room. In the past, I had only shimmed ink disks that were being transplanted from one press to another, but this press had contended with this problem for the entire first 80 years of its life - since it was made in 1941!  As
the rollers come down off of the ink disk, they are not
aligned with the rails of the chase bed - they have to
"bump up" a bit before they roll smoothly again. The ink
disk is too low for the rails. This is also where the ink
roller hook springs are at their most compressed point -
they simply cannot compress any more. This makes for a
very unpleasant printing experience - but it's a problem
easily solved. As
the rollers come down off of the ink disk, they are not
aligned with the rails of the chase bed - they have to
"bump up" a bit before they roll smoothly again. The ink
disk is too low for the rails. This is also where the ink
roller hook springs are at their most compressed point -
they simply cannot compress any more. This makes for a
very unpleasant printing experience - but it's a problem
easily solved. The solution is a shim. The shim looks like a washer, but is thin - only 1/16" in this case, although we have them - and make them - in different thicknesses and different diameters. When installed, it raises the ink disk just enough to eliminate that "bump" as the rollers come down off of the disk and are supported by the rails again. It's not a problem on the up upstroke, because then, the rollers bumped down - from the rails to the disk, whereas on the down stroke, they bumped up from the disk to the rails. Now, they don't bump at all; they ride smoothly both up to and down from the disk. You can check for this bump on your press by simply laying a flat board on the ink disk, then looking at the space between the board and the rails. That's the gap that's causing the problem. Remove that gap and you solve the problem - and your press operates far more smoothly.... See this brief video of the installation process on our Youtube channel (scroll up to see the latest post) top Special features of this restored/remanufactured press: n.b.: We know these presses pretty well, have over fifty years' experience doing letterpress printing, and have been restoring Kelseys for well over ten years now, so we are constantly thinking about ways to make them work better - more like the big presses that I know so well. (I replaced my Kelsey 3x5 with an 8x12 Chandler & Price when I was 14 years old...) As we come up with new ideas, we incorporate them into our restorations. Here are some of the things we are doing to this press to make an old Kelsey press "better than new"...
page
last updated
January,
2019 ~ February, 2019 ~ March,
2019
|
|||||||||||||||||||||||||||||||||||||||||||||||||||||||||


