THE EXCELSIOR PRESS MUSEUM PRINT SHOP AND
RESTORATION FACILITY
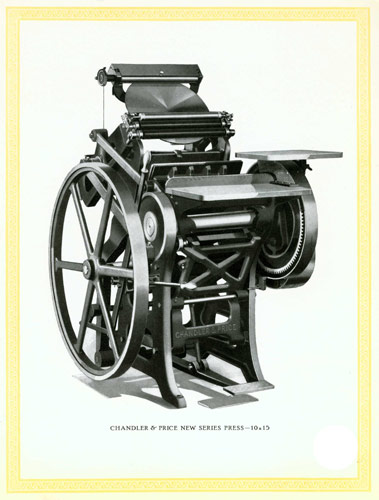
Mounting a Motor
on a Chandler & Price
Platen Press
Easily
& Inexpensively
~
~~~~~~~~~~
|
|
|
First of
all, most
printers these days will wisely choose to
operate their press by treadle at 10 impressions
per minute. But, if you want to drive your
press faster or for whatever reason prefer
to use a motor, here's a good way to set it
up
It can be
done easily, but it can also be a bit tricky.
The motor shaft must be perfectly parallel to
the press' main shaft. They must line up
perfectly, or your wide leather belt will tend
to wander off to one side or another and slip
off the drive wheel.
Most presses have a 2' diameter flat drive wheel
on the right side, although this technique can
also be used to drive a motor from the left side
if no drive wheel is present - it's just bit
more tricky - and it can be dangerous. Driving
from the right side is easier and safer.
Also - the motor speed is an issue. The large
flywheel on the left will run the press more
slowly than if driven by the smaller original
drive wheel on the right.
Adjusting that
motor alignment can be a bit tricky. Fancy,
fully adjustable motor mounts were often used on
these presses, and we do have some here if you
choose to go that route. But there is another
way - a simple and amazingly inexpensive way.
|
This photo shows a motor mounted on a rail - by
itself. Bolt your motor directly to the rail -
with the bolt sticking UP from beneath the rail
so that it can be tilted slightly to the left or
right by simply turning a nut. (see mounting
illustration)
You can also mount the motor on a plate which
will in turn be attached to the rail. A plate
will make vertical angular adjustments easier.
Once the motor is firmly mounted to the rail,
raise up the side of the press and slide the
rail beneath the press. Install one lag bolt
into the rail at the back right foot of the
press. Then fit the belt to it. Align it,
then test the alignment by running the press for
a few minutes and adjust the angle using the
*front* of the rail - move it left or right as
needed to align the motor shaft with the press'
main shaft.
Once the motor is perfectly aligned and the
press runs as it should - and the belt stays on
- fasten the front foot to the rail to the rail
using large, short 5/16" (? measure bilts) lag
bolts. They hold firmly in fresh wood. But note
that the Early Series press' mounting hole
requires a shorter lag bolt than on the New
Series press. (Alan - add lag bolt dimensions)
Old rails, btw, tend to be weakened by years of
oil and moisture exposure. They may look good on
the outside, but could be nothing more than wet,
oily pulp on the inside. Believe me, I
have been fooled in the past, but never again. On every press
move, I bring along new rails - just in case
they
are needed. Break down and buy two
nice, new fresh 2x6's or 2x8s for your new
rails. It will be worth the investment.
If your press is mounted directly to the floor,
add new rails. They will come in handy both to
disburse the weight of the press on your floor
as well as to allow you to raise the press up
onto two pieces of 2" black pipe to enable easy
rolling the press any time you may want to move
it.
You can also mount the motor onto a square wood
base - to make the tilting a bit easier. But for
all lateral moves, the long press rail is the
best set up. You can tap it left or right from
the front of the press while running the belt -
until the belt stops "wandering" and stays flat
on the drive wheel.
Note:
Additional notes:
Changing
press rails - may be necessary mount
the motor in this fashion. Changing the press
rails is not difficult and again, not expensive.
To replace (or install new) rails is simply a
matter of raising up one side of thepress,
sliding the new rail under the press' feet and
lowering the press basck onto it. Replacing or
installing a rail on the other side is just as
easy.
(Alan - add
press rails installation illustrations)
A note about
Drive Belts - Old drive belts can fail,
but they rarely do. I have been operating my
10x15 since 1967 with the same belt. It broke
once; I fixed it and it is still running -
although it is well over 50 years old.
I do recommend using Neatsfoot or other
Boot Oil to treat the leather. There's nothing
special about this belt material; it is simply
leather, tanned on one side, rough on the other.
These belts are/were used on line shafts around
the world for many years, and you can likely
find some nearby. You can also buy a pre-cut
belt - with clips - for about $100.
|
|
~~~~~~~~~~~~~~~~~~~~~~~~~~~~~~~~~~~~~~~~~~~~
Please contact Alan Runfeldt with other
questions by phone to 908 627-2730 or at
alan@ExcelsiorPress.org
page
last updated July, 2019l
|