The press is packed and shipped. This page points out some details of the crating and suggestions for uncrating the press for operation. It should take no longer than 10 minutes to be ready to print. We recommend a 9-12 volt power screwgun to remove the many (20+) screws using in this packing. A 7/16" box wrench would be enough to remove all of the nuts.  �
A fresh
tympan is mounted and a bundle of
typman papers is taped to the base beneath the press. �
A fresh
tympan is mounted and a bundle of
typman papers is taped to the base beneath the press. � A small catalog, parts list and all the literature we have on the Pilot is bound in a booklet inside of an envelope placed between the platen and the bed of the press. (There is also reproduction of an old California Case layout card that we collected from an old print shop) The last print made on this press in NJ is in the crate as well. It's an excerpt from an Emerson Essay printed in red on yellow vellum bristol. Ten lines of 18 point Nicholas Chochin Roman. Finished crate: To get to the press, remove the lowest row of screws (only) along the bottom (of all four sides) and then lift off the entire top straight up to get it off of the base. The lowest row of screws are run into the 4 base pieces attached the main platform. With those out, everything else will be free and the entire top will lift straight up. But, be careful, the screws to the last panel braces added to close the open top below, go all the way through the upper braces and stick out on the inside of the box. You may not even see them, but there are sharp screw tips inside the upper part of the top box.  The crate is braced on all four sides, with two cross-braces across the center to add extra strength. (this photo was taken before last panels and braces were screwed into place)  The rollers were put into the
drilled blocks made to hold them and then mounted on top
of the
feedboard, locked into place with a custom block and
wrapped and taped
into place for further security. To remove the rollers,
simply remove
the
tape and paper, then remove the bolt and block on
the right. The rollers were put into the
drilled blocks made to hold them and then mounted on top
of the
feedboard, locked into place with a custom block and
wrapped and taped
into place for further security. To remove the rollers,
simply remove
the
tape and paper, then remove the bolt and block on
the right. Replace this block with the feed board after is unpacked. Reverse the bolt to have a smooth side on the top as you install the feed board. 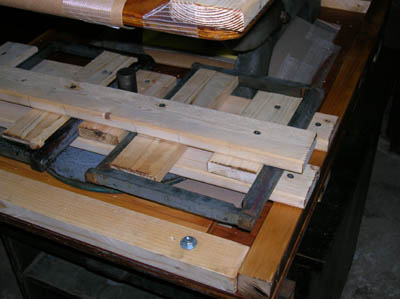 The Feed Board, Ink Table and
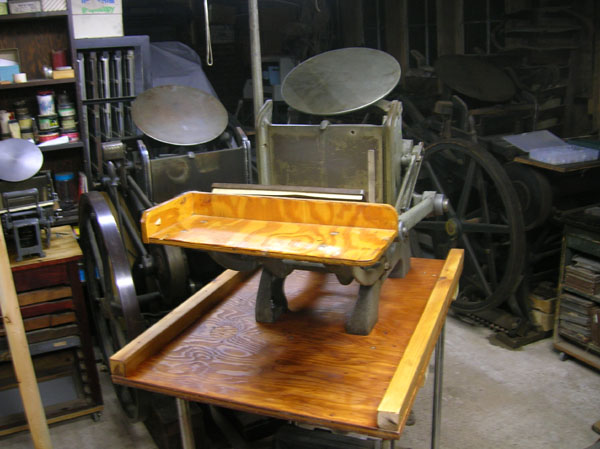
Chases are held to the base with blocks and screws. The Feed Board, Ink Table and
Chases are held to the base with blocks and screws.Remove the screws that are easily accessible from the sides, and then you can remove the layers of blocks and braces to get to the pieces beneath them. only the easily-accessible screws need to be removed. The feedboard slips under the lip of the front cross piece, so lift it out by raising the back edge first - OR - remove the bolts holding the cross piece in place and set it aside, then the feed board would be free. 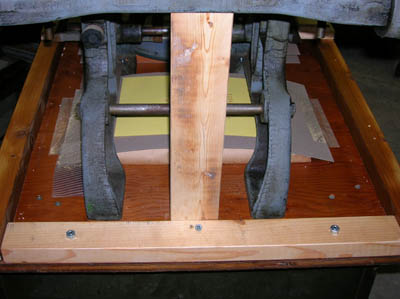 The roller arm assembly (yoke) is blocked into place with this back brace. One long screw holds the base in place. The top is fitted into a slot on the arm assembly. Remove this back brace before cutting the string that holds the lever in the front. (see below) 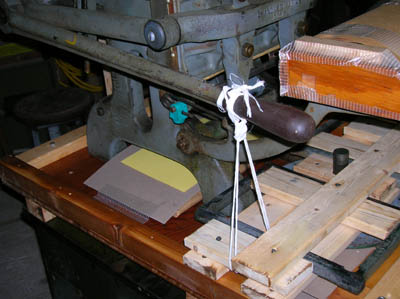 When this back brace is is removed, the string tying down the Lever is all that will prevent the main lever from swinging up. Hold the lever down as you cut the string, and let it up slowly. The nuts holding the back cross base brace can be removed and the boards lifted straight up and set aside. The resulting base can be used as a permanent table top for this press.  The press is securely bolted to the base, but can also be easily removed by simply removing the nuts from the top and raising the press straight up. Note: the 2x3 skid blocks beneath the base can be easily removed from the top of the base board if you want to lay the base flat on an existing table or bench. The side rails are screwed into the plywood from beneath and will be more difficult to remove, since the base will have to be set on a high bench and overhung to give access to those screws from below. 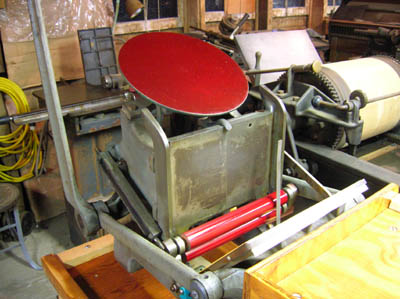 The last inking of this press was to print a sample of 10 lines of 18 point hand-set text. It printed nicely and a sample is in the crate. After that, the press was cleaned, ink table and rollers removed and packed up for shipment.  Excerpt from essay by Ralph Waldo Emerson, set in 18 point Nicholas Cochin Roman 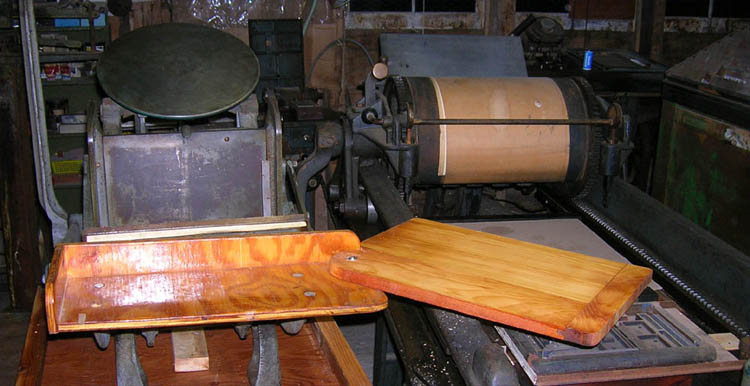 The new feedboard attachment swings out to the right and can be swung back to fit snugly on top of the delivery board when not in use.  March,
2018 - Crating Update: March,
2018 - Crating Update:For this press, "The Bronze Pilot" (Early Series, pre-1914), we did things a bit differently. Removal of the upper crate is as before: To get to the press, remove the lowest row of screws (only) along the bottom (of all four sides) and then lift off the entire top straight up to get it off of the base. The lowest row of screws are run into the 4 base pieces attached the main platform. With those out, everything else will be free and the entire top will lift straight up. The press is permanently mounted on two 30" long hardwood rails. These rails have two lifting handles across the front and the back. The press rails are held to the base of the crate with removable cross-braces. These must be removed to slide the press off of the lower base. Re-Assembly of the Press
Note: The platen bolts on this press are not original. Please follow these instructions for adjusting the platen. The platen on this press has been backed off to allow for thick, soft packing - best for prints; although not the best for metal type forms. The only adjustment that should ever be needed for this press would be the alignment of the platen. It is held in precise position by the positions of the 4 large bolts that screw into the platen through the yoke. To bring the platen closer to the bed, the (thin) inner nuts must be turned clockwise; to move the platen further back from the bed, these nuts must be turned counter-clockwise. The thicker outer nuts lock the setting into place. Loosen these first to allow adjustment of the inner bolts, then tighten to hold the setting in place. |