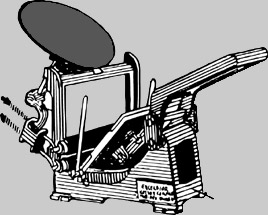
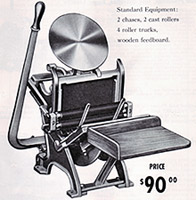
HOME -> DIRECTORY -> REFERENCE -> SMALLPRESSWORK.HTML BASIC Press works subjects: Letterpress printing is not rocket science. But it is a craft and there are techniques to study and learn. Below is a short list of subjects worth viewing or reviewing if you are to get the most out of your letterpress experience. "The whole challenge of letterpress printing is to get just enough ink from the can on to the paper - in just the right place and in just the right amount and with just the right amount of pressure to make a clean transfer. It starts on the ink disk, then goes onto the rollers where it is supposed to transfer just enough to the form so that it can transfer all the ink it has onto the paper - with just enough pressure applied to make the transfer neat and the image sharp." - AR That's basically all there is to it! ;) Of course, it's not always quite so easy to get all this done in the beginning.... but relax, it does get easier with experience - and that can come very quickly... This page will grow as we get more photos - and time to add comments on each of the following subject. Some links will open a new page; others are to sections on this page.
Tympan, Packing and Make Ready To mount your gauge pins and set the proper packing thickness on your small platen press, you'll have to first "hang" a "hanger sheet" onto your platen. The hanger sheet is typically a very hard, oiled & calendered paper known as "Tympan" (as in the Timpani drum). The paper is intended to be clamped onto the platen and be stretched as tight as a drum head. (Some tympan is actually marketed as "Drum Head Tympan") Once your top sheet - the "hanger sheet" is in place, you can open the upper bale and slip in 3-6 additional sheets of tympan, or perhaps a single piece of heavy thick hard "pressboard" and a few sheets of oiled tympan, and perhaps a sheet or two of hard coated "book paper" and lastly, perhaps a sheet of something thin - a 20# bond or some 9# onionskin. Do NOT use any sort of cardboard for packing - except in special situations. Generally speaking, chipboard is too soft and too impressible. Using cardboard can overload your packing and lock up your press. Stick with hard paper* and adjust the amount carefully, and you will get a good impression and avoid damage to your press. This is a good starting point for setting the impression for each particular job. Printing on thick paper requires less packing, printing on thinner paper - or printing a large full form - will require more packing. Note: If your press requires considerably more packing to get a sharp clear impression - or "punches" the image with this amount of packing, you may want to look at adjusting your platen height - see "leveling your platen" Beware of the "soft packing". It may force a deep impression, but can also lead to quite literally breaking your press. When soft packing is compressed during the printing cycle, it absorbs energy and produces a "spring-back" effect which can cause your platen, form and bed to "lock up" on full impression. If that happens, it may be nearly impossible to get it free of impression simply because the packing compressed too much. In cases like this, it may become necessary to use a wrench and "back off" the platen impression bolts to relieve the pressure without snapping some old piece of cast iron by forcing it through a cycle it cannot safely complete. Chandler & Price platen presses have been known to lock up like this; Kelseys do it quite often and we have had to repair a number of Pilot Presses - both cast iron and aluminum - which have broken under the strain of too much impression. So. rule #1: Don't Break Your Press *When it is ok to use a soft packing: At the same time, when properly used - and the press is not over-packed, a soft packing can improve the image achieved with larger forms of text, halftones and solid images. The important thing here is to avoid over packing (see above). A sheet of chip board, coaster board - or even thin rubber - can greatly enhance the image when working with a large form, detailed image or very worn type. Sometimes, with heavier stocks, it helps to moisten the *back* of the sheet to soften the fibers and allow a bit more flexibilty as the sheet is pressed against the form. You don't want it too wet - and you especially don't want to get the printing surface wet, but a sponge applied to the back of the sheet, a few seconds in a steamer (or even microwave oven) can make the paper temporarily softer and allow it to form better against the type or engraving. Now, for some advanced discussion, see: Extreme Make Ready Setting Gauge Pins  On a small press platen, space is limited. Furthermore, sometimes the left-side gauge pin may be "in the way" of a gripper arm, the left roller rail or an engraving or polymer plate base. When it's a appropriate, you can simply cut a small triangular slit for the left guide instead of mounting a gauge pin where it may be crushed. Note: This same triangular slit technique can be applied if you want your left guide to be off of the platen - when you're feeding a wide sheet, for example. When this is the case, you can insert a particularly wide stiff undersheet into your packing and extend it off to the left (or right) of the platen. (We'll add a photo of this next time we think to take one...) click here for more information on the common Megill Gauge Pins Checking ink roller Height using a piece of 18 point solid rule. Since what we are aiming for is consistent pressure at four primary points on the rollers, a "lollipop" roller height gauge as used on a Vandercook flatbed cylinder press is not the best tool for the job on a platen press. Instead, we recommend that you use a simple piece of 18 point solid rule cut a few inches longer than the short dimension of your chase.
Taping the Trucks to adjust roller height on a platen press. Taping the rails is an old trick that works okay on some larger presses - presses like the big commercial-grade Chandler & Price that have 3/4" wide rails. And, in fact, some advanced design platen presses have adjustable rails to make this possibly frequent adjustment very easy. But it's still not accurate on a roller-by-roller basis, and is definitely not a good idea on a table-top press with narrow rails. Sin 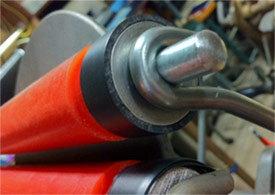 ce "taping the rails" is a
technique known as an old printer's trick, some
less-well-informed members of the new letterpress
community try to apply it to the smaller presses they use.
Not good. The Kelsey rails are only about 1/4" wide and
building up tape on them is just asking for trouble. ce "taping the rails" is a
technique known as an old printer's trick, some
less-well-informed members of the new letterpress
community try to apply it to the smaller presses they use.
Not good. The Kelsey rails are only about 1/4" wide and
building up tape on them is just asking for trouble. Shortly after the turn of the century, a fellow named Morgan designed an expandable truck for the C&P and other large presses. This truck can be adjusted to different diameters based upon the condition of the individual roller its mounted on. I use them on my big presses and they work great. And, that's where I got the idea of taping the trucks instead of the rails. I strongly recommend taping the trucks vs the rails. It works well; I do it; I teach it and I endorse the technique. Besides, when you're done, you have a nice rubber "tire" wrapped about you trucks and they roll more smoothly and quietly. Just be sure to trim off any excess tape on the edges - so that the truck edge is clean and does not jam against the hooks. Good quality electrician's Black Vinyl tape will work well - and will stay on for years - unless you leave them in the sun and they warm up too much... Cheaper tapes may not adhere as well and may be sensitive to any solvents used to clean the rollers. And, if you need to change diameters, it's quick and easy to do. But - if you are increasing diameter (to make the test line thinner), be sure to remove all tape and apply all new tape. If, on the other hand, your test line(s) for any roller or side are too thin, and you are not inking well, simply remove some tape - 1 -2 revolutions at a time - to make the test strip wider. I have not written a detailed instructions page on this subject yet, but I did address it - with photos - when Lauren and Amanda came by with their 5x8 last June. Please take a look at blog.2011.html to see the June 18 entry showing Lauren's taped trucks. That's what we're aiming for. Here's How To Do It - Step by Step
If it still raises the roller about 1/16" of an inch - or the thickness of two heavy-weight business cards, you could still be okay on that press. If not, the truck may need some more tape. I generally use 12-24" tape on each truck, depending upon the press and the difference between the roller and truck diameters - and the height of the rails on the press I'm working on. (see note below) But do be careful about applying so much tape that the roller does not roll over the form with enough pressure. You may need to increase spring tension if the roller isn't being pulled to the form with enough force to lay ink on the entire form. If none of this works for you - and if you are still encountering inking problems - rollers too low, slurring of the type or uneven inking, the solution may be to use a set of Roller Bearers. These are essentially "support rails" for your rollers. -------------------------- Note: Some ill-informed and inexperienced printers believe that the trucks and rollers should be the exact same diameter and should match some oem "specification". But, from my experience - particularly with the Kelsey presses, I have found variations in the height of the rails between presses - and sometimes even between opposite sides of one press. I have also observed different presses and different applications that required or used different diameter trucks; Adana come with a two-diameter truck. C&Ps came with undersized trucks to be used when printing ruled forms. Morgan invented the Expandable Truck around 1900 to allow easy adjustment of individual trucks with precision. For that reason, I have decided that the only way to accurately adjust the height of the ink rollers is to measure with a flat bar and adjust the trucks individually to match the press they're on - and a $2 roll of Black Vinyl Electrical tape and a little bit of time is the perfect way to do that. Unfortunately, no one had perfected an adjustable truck for table top presses. No need; the tape and a little skill and any craftsman can make his or her press print as it should.. Lowering Rollers relative to the form. To effectively lower your ink rollers relative to the form you are printing, simply add some hard, oil-sheet tympan packing behind the form. This will raise up the form relative to the face of the plate and will increase the ink pressure applied to the form. Adjusting roller spring tension on a Kelsey Excelsior: Basically, the challenge is to supply sufficient pressure so that the rollers depress against the form and the trucks roll flat along the rails, but not have so much pressure that they hang up as they roll up the form and onto the ink disk. That's the trouble spot - you hit it on the upstroke. It's that change in angle from rollers coming across the ink disk then compressing the springs almost fully as the hooks get pulled out and around that sharp angle before they begin going down the form. Too much tension and you just about pull the press off of the desk; too little and the rollers don't deflect enough to leave a nice film of ink behind. On a 5x8 Kelsey Excelsior, I'd guess the optimum deflection would be something between 6 and 12 points. The optimum tension? I don't really know. It really is mostly an effort of trial and error to get just the right amount of tension for your press. If I get a gauge on one of my presses, I'll do some tests and update this page. Testing rollers for "tack"... Aside from looking nice, being of the proper diameter and matched to the diameter of the trucks, one common problem is with rollers that lack the tack to distribute ink properly. When rubber rollers are cast in a mold, the molds are treated with a spray silicone release agent to help remove the cast rollers from the molds. This silicone must be removed immediately. If not, it may continue to "weep" from the rollers over time. If your rollers look wet and are coated with a really slick liquid, it may be silicone and can be removed using Lacquer Thinner. The way to test the tack of your rollers is to set a small lima-bean-sized blob of ink on the disk, then pump the handle of the press to get the rollers to go up and down and to activate rotation of the ink disk. At temperatures below 50 degrees, the ink simply will not spread and will remain a tar-like blob on your ink disk. But at 70 degrees, the ink should spread like peanut butter. If the ink stays in a blob, looks smooth on top and does not spread - and acts more like tar than ink, it's either too cold, or the rollers are too slick and need attention. In some cases, it would be enough to wipe them down with a solvent - acetone or lacquer thinner - that will remove any glaze or, in the case of new rollers which may be been stored for a while before being used the first time, they may be coated with "weeping" silicon that was left over from the casting process. Get yourself some Lacquer Thinner and wipe down those rollers with it until they become a little bit sticky - "tacky" is the technical term for it. You can slide your finger across them to get a "feel" of their tack. I have some red rollers here - rollers which were cast by someone else - and have noted that they continue to release silicon onto the surface as the shop gets colder. The solution is lacquer thinner. Use it until the proper tack is achieved, then switch to Mineral Spirits as your regular clean-up solvent. And, if you cannot revive the tack of your - even "new" - rollers, you may want to try some of our high-tack 20-durometer Vita Flex rubber rollers. These are almost as soft and tacky as the best old style composition rollers commonly used in the past, and popular with some letterpress purists. For more information on using the Kelsey - or any small press - we recommend a visit to Don Black's web site, where he has published portions of the original Kelsey "Printer's Guide" - http://www.donblack.ca/kelsey/ ~~~~~~~~~~~~~~~~~~~~~~~~~~~~~~~~~~~~~~~~~~~~ TOP |